
Contents
Introduction
This guide explains how to install the Iptor WM1 server and client software, and how to verify the installations.
Who should use this guide
This guide is written for experienced system installers who want to perform an efficient installation of Iptor WM1. The system installers using this guide must have working knowledge of the following information.
- The number of physical servers the installation requires
- Database servers
- Application servers
- Web servers (if applicable)
- Which server components need to be installed on each server
- The desktop clients and web browser clients (if applicable) used for this installation
- The supported equipment, such as RF terminals and voice controllers, used for this installation
System architecture
The following image represents a typical physical server configuration. It is meant to provide a general understanding of how the individual server components can be installed and how they communicate with other server and client components within a configuration.
| Note | The minimum requirements that are provided in the image represent only what is required to install the software and do not account for customizations or variances in load volumes. You will likely require a faster CPU and more disk space and memory. Consult your Iptor project manager to discuss your specific system needs. |

Before you install or upgrade
Before you install or upgrade the Iptor WM1 software, take the following actions.
- Make sure your system meets the requirements and that you have all additional software installed. For details, see the Technical Specifications.
- Locate your license key information, as you will need it when completing the installation procedures.
- If upgrading, review the list of upgrade concerns, following in this section, and take any steps needed based on your configuration.
Upgrade concerns
Impact to multiple step pallet replenishment tasks that are partially executed
In order to resolve JIRA issue DYN-1110, the picklist confirmation for pallet replenishment tasks was moved from the first task detail to the last task detail. If at the time of upgrade, a pallet replenishment task exists with multiple task details, where the first task detail is already executed but other details for the same task are still pending, the upgrade program will “convert” the open task details to pallet transport task details to ensure that the pallet is still directed to its final destination (and to prevent a picklist confirmation from executing twice for this task as that would corrupt the database).
In some environments this approach may have some negative effects, as some other functionalities were already included in executing the last pallet replenishment task detail that are not available on pallet transport tasks. The following are some examples.
- Replenishment of piece picking locations with pallets containing other handling units (such as boxes) – Executing the last replenishment task could include a conversion of the container inventory from the boxes to the pieces. As this functionality is not included in pallet transport tasks, this conversion may have to be done manually after executing the last pallet replenishment step (change the handling unit of the inventory using the existing function “change product keys”).
- Replenishment to a pick location with a fictitious container – Executing the last replenishment task would include a move of all the inventory from the replenished pallet to the fictitious container. As this functionality is not included in pallet transport tasks (without the explicit definition of a similar container exception), this “move all inventory” function will have to be done manually after executing the last pallet replenishment step.
In order to avoid in such environments the extra manual interventions, make sure that at upgrade time no multiple step pallet replenishment tasks exist that are partially executed. The existence of such tasks can be verified executing following SQL statement.
SELECT DISTINCT tashea.task_number
FROM vw_taskhd_active_palletmove tashea
INNER JOIN task_detail tasdet ON tasdet.task_number = tashea.task_number
AND tasdet.sequence_number = 1
AND tasdet.task_status = 90
INNER JOIN vw_taskdt_active_palletmove open_tasdet ON open_tasdet.task_number = tashea.task_number
WHERE tashea.task_type IN (‘REPLE’, ‘REPLM’)
AND EXISTS(SELECT *
FROM outbound_order_detail_allocation ouorda
WHERE ouorda.picklist_number = tasdet.picklist_number
AND ouorda.task_number = tasdet.task_number)
Additional software required for cockpit charts and the Iptor WM1 CAP Editor
The Iptor WM1 desktop client installation no longer includes the .dll file needed to create cockpit charts, or the .dll file needed to use the Iptor WM1 CAP Editor. If you require this functionality, you must purchase Infragistics™ 14.2 Windows Forms Tools.
Custom CAP form upgrade required
As part of the move to Infragistics 14.2, the level 0 CAP forms were upgraded. If you have any custom forms above level 0, you must run sph_cap_replace_infragistics_version.sql to upgrade all custom forms.
Time zone handling impact to warehouse setup
The enhanced time zone handling update process changes all of the dates and times in the database to the UTC time zone, and then defaults all warehouses to the UTC time zone. Warehouses that are not in the UTC time zone will need to be reset to the proper time zone.
Database and application server installation
Components installed
The following components can be selected for installation.
- On the database server:
- Database, which supports the configuration and transaction data, along with the stored procedures that contain the business logic of the Iptor WM1 application.
- On the application server:
- Iptor WM1 Compact Application (CAP), which is the interactive user interface for mobile devices, such as RF devices and tablets. CAP connects to the database for transactions logging and business logic.
- Printing application, which handles the report and label generation.
- Printer service, which is configured using Windows print drivers.
- Integrator files, which are required for communication with host and external systems.
| Note | If installing the Integrator files, stop the Iptor Service Manager before beginning the installation process. |
Installation sequence
In a typical installation, you would install the database and application server components in the same instance. Depending on your configuration though, you may need to install one or more of the server components in a different instance or on a different server.
If performing multiple installations, complete them in the following order.
- Database server components
- Application server components
Install the database and application server components
Complete the following steps to install the Iptor WM1 database and application server components for your system.
- Log on as administrator to the server on which you are installing the components.
- Navigate to the location of the Iptor WM1 installation program.
- Double click the exe file.
- On the Welcome to Iptor WM1 Setup Wizard window, click Next.

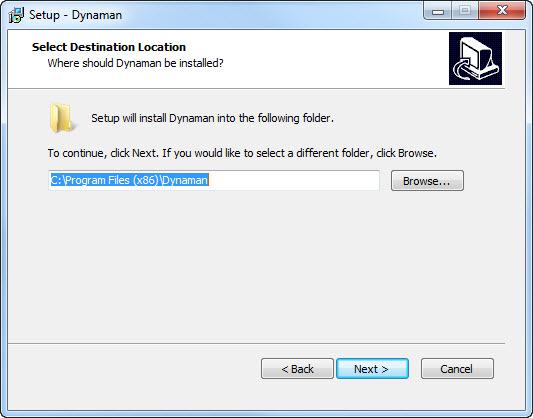
- On the Select Destination Location window, enter the path of the location where you want to install the server components, and then click Next.
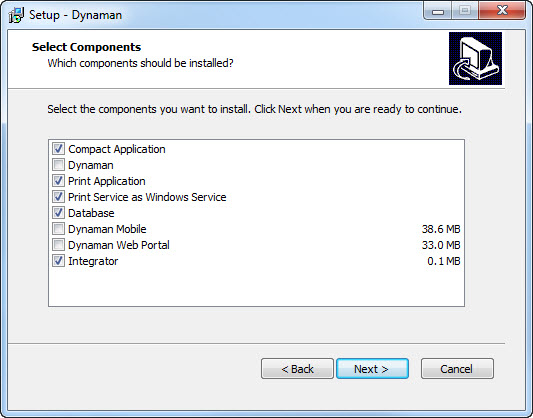
- On the Select Components window, select the components to install, and then click Next.
| Note | In a typical installation, you would install the database and application server components in the same instance. If your configuration requires separate instances though, install the database instance first, and then repeat this procedure to install the application instance. |
| If this installation is for… | Then select the check box for… |
| A combined database and application instance, |
|
| A database instance, |
|
| An application instance, | The application components that you are using, which may include some or all of the following:
|
- On the Select Start Menu Folder window, enter the name that you want to appear in the list of programs when accessing this instance from the Start Menu, and then click Next.

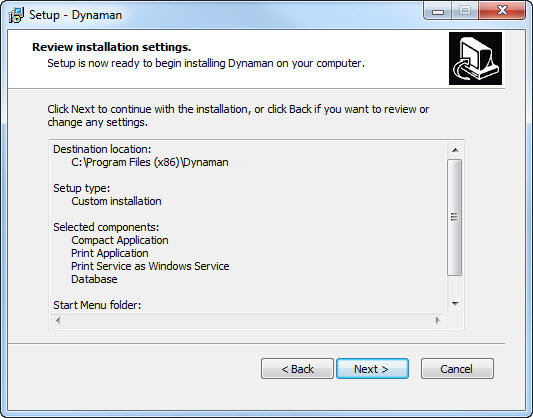
- On the Review Installation Settings window, review the planned installation components for accuracy, and then click Next.
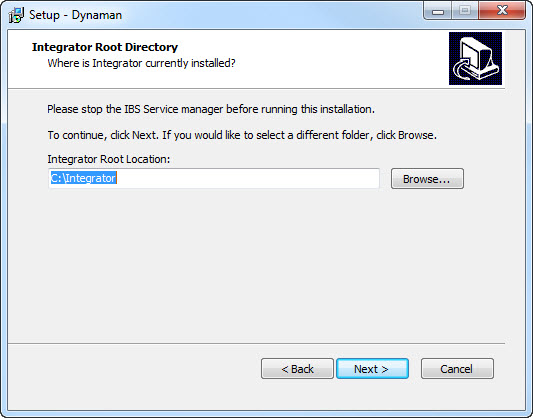
- If the installation includes the Integrator files, then on the Integrator Root Directory window, enter the path of the location where Integrator is installed, and then click Next.
| Note | If you have not already done so, stop the Iptor Service Manager before continuing with this installation. |
- On the Database Connection Information window, select the authentication method to use when connecting to the database server.
| If you are using… | Then select… |
| Operating system authentication, | Windows Authentication. |
| Database authentication, | SQL Authentication. |

- In the Server box, enter the host name of the server where the database resides.
- In the Database box, enter the name to use for the database (or if the database is already installed, enter the name of the database to which the application server instance will connect).
- If you chose SQL Authentication as the authentication method, take the following actions.
- In the User Name box, type the SQL Server user.
- In the Password box, type the password to use to connect to the database.
- Click Next.
- If installing the database component and the database information that you entered matches an existing Iptor WM1 database, then when a message appears indicating that the database exists and asking if you want to upgrade it, take one of the following actions.
| If you… | Then click… |
| Want to upgrade the existing database, | Yes. |
| Do not want to upgrade the existing database, | No, update the database connection information, and then click Next. |
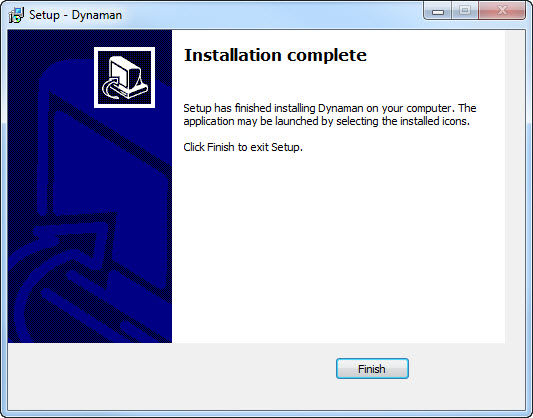
- When the installation process completes, on the Installation Complete window, click Finish.
After you install or upgrade
After you install or upgrade the Iptor WM1 software, take the following actions.
- After installing the database server component, you need to update the user license with your specific license key. If not updated, an error message appears when logging in indicating that the license has expired.
- On the Iptor WM1 database server, open SQL Server® Management Studio, and connect to the server as an administrator.
- In the Object Explorer, expand the Databases
- Right-click the Iptor WM1 database that was just created, and then click New Query.
- In the query box, enter the following text.
UPDATE user_tb SET user_license = ‘<LICENSE KEY>‘ - Click Execute.
- If this was an upgrade, review Upgrade concerns and take any steps needed based on your configuration.
Web server installation
Components installed
The following components are selected for installation on a web server.
- Iptor WM1 Mobile, which provides yard operations functionality that yard spotters access from a web browser to perform their daily activities.
- Iptor WM1 Web Portal, which provides real-time analytics and dashboards that operators and supervisors access from a web browser to manage their daily activities.
| Note | Even if only planning to use one of the web products, you must select both components during the installation process in order to install all of the files that are required on the web server. |
Install the web server
Complete the following steps to install the Iptor WM1 web server components for your system.
- Log on as administrator to the server on which you are installing the components.
- Navigate to the location of the Iptor WM1 installation program.
- Double click the exe file.
- On the Welcome to Iptor WM1 Setup Wizard window, click Next.
- On the Select Destination Location window, enter the path of the location where you want to install the server components, and then click Next.

- On the Select Components window, clear all of the check boxes except the Iptor WM1 Mobile and Iptor WM1 Web Portal check boxes, and then click Next.
| Note | Even if only planning to use one of the web products, you must select both components during the installation process in order to install all of the files that are required on the web server. |

- On the Select Start Menu Folder window, enter the name that you want to appear in the list of programs when accessing this instance from the Start Menu, and then click Next.
- On the Review Installation Settings window, review the planned installation components for accuracy, and then click Next.
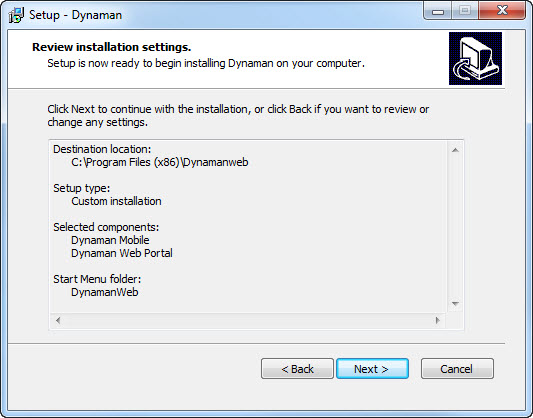
- On the Iptor WM1 Web Root Directory window, enter the path of the location where you want to store the web files, and then click Next.

- On the Database Connection Information window, select the authentication method to use when connecting to the database server.
| If you are using… | Then select… |
| Operating system authentication, | Windows Authentication. |
| Database authentication, | SQL Authentication. |
- In the Server box, enter the host name of the server where the database resides.
- In the Database box, enter the name of the database to which the web server instance will connect.
- If you chose SQL Authentication as the authentication method, take these actions.
- In the User Name box, type the SQL Server user.
- In the Password box, type the password to use to connect to the database.
- Click Next.
- When the installation process completes, on the Installation complete window, click Finish.
Desktop client installation
Component installed
The following component is selected for installation on a desktop client.
- Iptor WM1, which is the user interface for use on desktops. It connects to the database server to execute stored procedures and interact with the domain model of Iptor WM1.
Install the desktop client
Complete the following steps to install the Iptor WM1 client component on a desktop.
- Log on as administrator to the desktop on which you are installing the client.
- Navigate to the location of the Iptor WM1 installation program.
- Double click the exe file.
- On the Welcome to Iptor WM1 Setup Wizard window, click Next.
- On the Select Destination Location window, enter the path of the location where you want to install the desktop client, and then click Next.
- On the Select Components window, clear all of the check boxes except the Iptor WM1 check box, and then click Next.

- On the Select Start Menu Folder window, enter the name that you want to appear in the list of programs when accessing the client from the Start Menu, and then click Next.
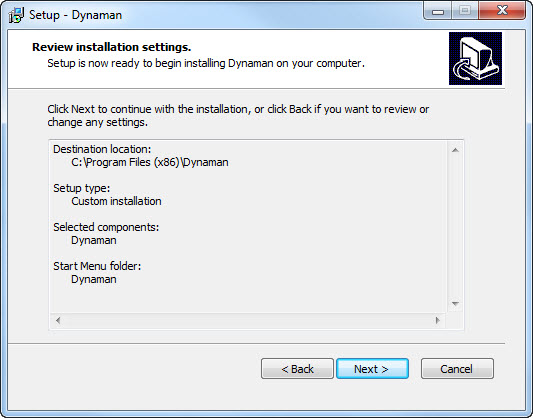
- On the Review Installation Settings window, review the planned installation components for accuracy, and then click Next to begin the installation process.
- On the Database Connection Information window, select the authentication method to use when connecting to the database server.
| If you are using… | Then select… |
| Operating system authentication, | Windows Authentication. |
| Database authentication, | SQL Authentication. |
- In the Server box, enter the host name of the server where the database resides.
- In the Database box, enter the name of the database to which the desktop client will connect.
- If you chose SQL Authentication as the authentication method, take these actions.
- In the User Name box, type the SQL Server user.
- In the Password box, type the password to use to connect to the database.
- Click Next.
- When the installation process completes, on the Installation Complete window, click Finish.
Installation verification
This section explains how to log in to the instances you installed in order to verify your server installation. Complete the procedures that are applicable to your specific system configuration.
Log in to Iptor WM1 CAP
- Log on to the application server on which you installed Iptor WM1 CAP.
- Take one of the following actions.
- On the desktop, double-click the CAP shortcut icon (
 ).
). - From the Start menu, display the list of programs, expand <Iptor WM1 Folder Name>, and then click CAP.
- On the desktop, double-click the CAP shortcut icon (
- On the Login Panel, take the following actions.
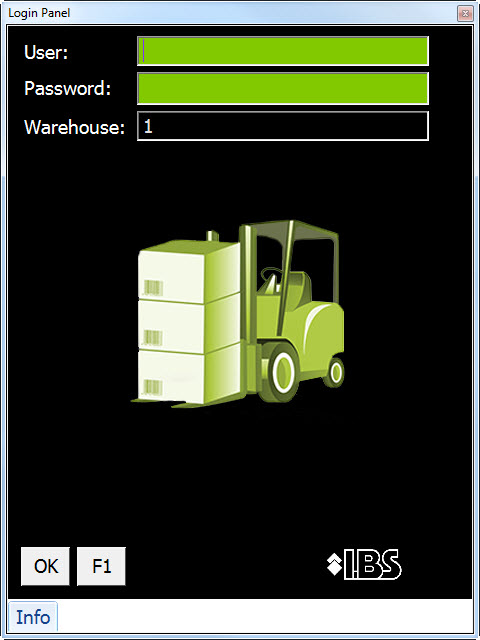
- In the User box, enter your user name, or for a new installation in which users have not yet been configured, enter Iptor.
- In the Password box, enter your password, or for a new installation in which users have not yet been configured, enter Iptor.
Note For security reasons, after creating your own administrative users, remove the Iptor user, as the Iptor user has full privileges. - In the Warehouse box, enter the identifier for the warehouse to which you want to log in, or for a new installation in which warehouses have not yet been configured, leave the default value.
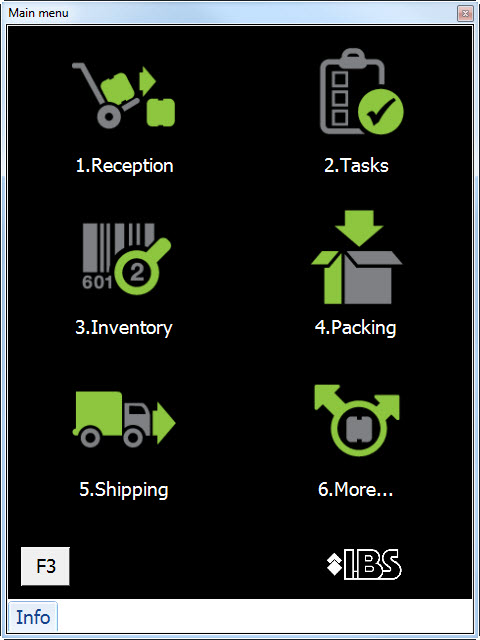
- Press OK. The Main menu opens, verifying that the product is installed.
Log in to Iptor WM1 Mobile
- Log on to the device from which you want to access the Iptor WM1 Mobile application.
- Start a web browser.
- In the address field, enter http://<SERVER NAME>/dynamanmobile, and then press Enter.
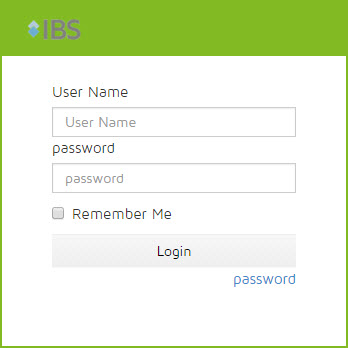
- On the Iptor WM1 Mobile login page, take the following actions.

- In the User Name box, enter your user name, or for a new installation in which users have not yet been configured, enter Iptor.
- In the Password box, enter your password, or for a new installation in which users have not yet been configured, enter Iptor.
- In the Equipment Code box, enter an equipment code, or for a new installation in which equipment has not yet been configured, leave the box blank.
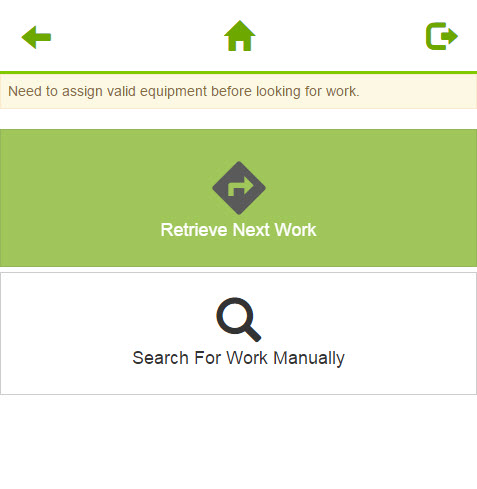
- Click Login. The Iptor WM1 Mobile home page opens, verifying that the product is installed.
Log in to Iptor WM1 Web Portal
- Log on to the device from which you want to access Iptor WM1 Web Portal.
- Start a web browser.
- In the address field, type http://<SERVER NAME>/dynaman/login.html, and then press Enter.
- On the login page, take the following actions.
- In the User Name box, enter your user name, or for a new installation in which users have not yet been configured, enter Iptor.
- In the Password box, enter your password, or for a new installation in which users have not yet been configured, enter Iptor.
- Click Login. The Iptor WM1 Web Portal dashboard opens, verifying that the product is installed.

Log in to the Iptor WM1 desktop client
- Log on to the desktop on which the Iptor WM1 desktop client software is installed.
- Take one of the following actions.
- On the desktop, double-click the desktop client shortcut icon (
 ).
). - From the Start menu, display the list of programs, expand <Iptor WM1 Folder Name>, and then click Iptor WM1.
- On the Iptor WM1 login window, take the following actions.

- In the User box, type your user name, or for a new installation in which users have not yet been configured, enter Iptor.
- In the Password box, type your password, or for a new installation in which users have not yet been configured, enter Iptor.
- In the Warehouse list, click the identifier for the warehouse to which you want to log in, or for a new installation in which warehouses have not yet been configured, leave the default value.
- Click Login. The Iptor WM1 desktop client window opens, verifying that the product is installed.

