
Contents
- 1 Introduction
- 2 Warehouses
- 2.1 Add a warehouse
- 2.2 Warehouse users
- 2.3 Warehouse zones
- 2.4 Dock schedules
- 2.5 Dock schedule and warehouse zone relationships
- 2.6 Putaway zones
- 2.7 Picking zones
- 2.8 Replenishment zones
- 2.9 Equipment macro zones
- 2.10 Equipment zones
- 2.11 User and equipment zone relationships
- 2.12 Equipment and equipment zone relationships
- 2.13 Transport areas
- 2.14 Warehouse defaults
- 2.15 Warehouse margins
- 2.16 Task priorities
- 2.17 Macro locations
Introduction
A warehouse is the physical and logical entity where goods can be received, stored and shipped. It is the highest level of your facility structure. All processing rules and system configurations are related to the warehouse. Therefore, properly defining the warehouse structure, functional zones, areas and defaults is key to a successful implementation. This guide explains how to set up the warehouse.
Basic data
In this guide you will learn how to set up the following data.
- Warehouses
- Warehouse users
- Warehouse zones
- Dock schedules
- Dock schedule and warehouse zone relationships
- Putaway zones
- Picking zones
- Equipment macro zones
- Equipment zones
- User and equipment zone relationships
- Equipment and equipment zone relationships
- Transport areas
- Warehouse defaults
- Warehouse margins
- Task priorities
- Macro locations
Warehouses
Your facility may have several warehouses. By default, the system has one warehouse with a warehouse code of ‘1’.
For a single warehouse implementation:
- Only one warehouse is defined per installation.
- Users are not required to identify the warehouse in which they are working when they log in.
For a multiple warehouse implementation:
- Most inventory related data and transactions belong to a specific warehouse.
- Users can be restricted to work in only one warehouse.
- Users are required to log in to a warehouse.
Add a warehouse
- On the menu, expand Basic Data > Locations > Location Setup, and then double-click Warehouse.
- On the Warehouse window, in the toolbar, click
 . The Add Warehouse dialog box appears.

- Enter the following information.
| Field | Description | Required | ||||||||
| Warehouse Code | Unique system code that identifies a warehouse. | Yes | ||||||||
| Warehouse Desc | Simple statement that defines the warehouse code. For example, if the warehouse code is NYWHSE, the description may be New York Warehouse. | Yes | ||||||||
| Address Line 1―4 | Postal address that can be configured to print on internal or external documents. Typically address line 4 could be used for the city or community, if in printed documents it appears next to the postal code. | No | ||||||||
| Postal Code | Postal code for the address. Format can be customized based your country’s postal code format. | No | ||||||||
| Country Code | Unique system code that identifies a country. Iptor WM1 uses ISO standard codes by default. However, these values can be changed. For example, they can be mapped to the codes for any host system. | No | ||||||||
| Language Code | Unique system code that identifies a language. Iptor WM1 uses ISO standard codes by default. However, these values can be changed. For example, they can be mapped to the codes for any host system. If a language is not specified, then the company language code is used by default. | No | ||||||||
| Responsible User Code | Unique system code that identifies a user. In this usage, it is the user to associate with the warehouse address. | No | ||||||||
| EAN Company | GS1 (7 digit) company prefix to be used for generating SSCC codes. | No | ||||||||
| EAN Address Code | Unique system code that uniquely identifies the address. Can be used for EDI transactions. | No | ||||||||
| Counting Integration |
Value that indicates whether counting tasks are integrated with normal warehouse operations (inline counting).
|
Yes | ||||||||
| Warehouse Active | When selected, indicates that the warehouse is usable. Warehouse activities cannot be performed in a warehouse that is inactive. | Yes | ||||||||
| Directed Refresh Rate |
Time interval, in seconds, at which the system checks for directed work. |
No | ||||||||
| Autoplan Expiration | Amount of time that passes before work automatically expires. During autoplan, before evaluating the warehouse zone for additional capacity, the work currently in the queue for move tasks in the warehouse zone is compared to the warehouse autoplan expiration. Any work that reached the autoplan expiration time is cleared from the system. This ensures that lower priority work is not kept when higher priority work exists. | No |
- Click Save.
Warehouse users
A user must be allowed for a warehouse to be able to log in.
Prerequisites
To complete this procedure, you must have already set up the following data.
- Users
- Warehouses
If you have not done so, perform the setup tasks for required data first. Then, return to complete this procedure. For optional data, if you do not have it defined yet, you can return to this section later in the setup process to add that detail.
Add a warehouse user
- On the menu, expand Basic Data > Locations > Location setup, and then double-click Warehouse.
- On the Warehouse window, right-click the warehouse to which you want to assign users, and then click Warehouse User.
- In the Warehouse User grid view toolbar, click . The Add Warehouse User dialog box appears.
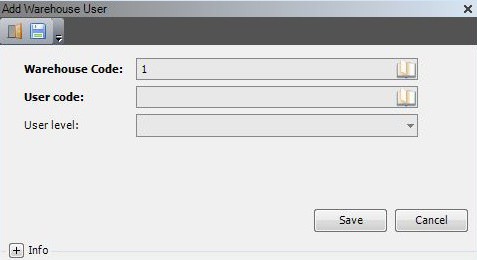
- Enter the following information.

| Field | Description | Required |
| Warehouse Code | Unique system code that identifies a warehouse. In this usage, it defaults to the selected warehouse. | Display only |
| User Code | Unique system code that identifies a user. In this usage, it is the user allowed to work in the specified warehouse. | Yes |
| User Level |
Value that indicates whether the user is allowed to work in the warehouse. The following values are supported.
|
Yes |
- Click Save.
Warehouse zones
A warehouse zone is a logical grouping of locations within a warehouse. Warehouse zones are used when configuring autoplan and for reporting purposes. You define the warehouse zones now as part of the warehouse setup, and then assign the warehouse zones to locations as part of Location setup.
For yard setup, typical warehouse zones include docks, yard, pad and overflow. Specific to the dock warehouse zones, after they are defined, you associate the warehouse zones with dock schedules to facilitate the flow of shipments to and from the facility.
Add a warehouse zone
- On the menu, expand Basic Data > Locations > Location Setup, and then double-click Warehouse.
- On the Warehouse window, right-click the warehouse for which you want to define zones, and then click Warehouse Zone.
- In the Warehouse Zone grid view toolbar, click . The Add Warehouse Zone dialog box appears.

- Enter the following information.
| Field | Description | Required |
| Warehouse Code | Unique system code that identifies a warehouse. In this usage, it defaults to the selected warehouse. | Display only |
| Warehouse Zone Code | Unique system code that is used in combination with the warehouse code to identify the warehouse zone. This code can be used in picking and putaway rules and when creating reports. | Display only |
| Zone Desc | Simple statement that defines the warehouse zone code. For example, if the warehouse zone code is DA, the description may be DA Docks | No |
| Zone Active | When selected, indicates that the zone is usable. | Yes |
- Click Save.
Dock schedules
For the docks in your facility, you must identify the days and times that the docks are available for inbound and outbound shipments, as well as the number of active inbound and outbound shipments that autoplan can move to the docks. After dock schedules are defined, you associate the schedules with a warehouse zone to facilitate the flow of shipments to and from the facility.
Add a dock schedule
- On the menu, expand Basic Data > Locations > Location Setup, and then double-click Warehouse.
- On the Warehouse window, right-click the warehouse to which you want to add dock schedules, and then click Warehouse Zone.
- In the Warehouse Zone grid view, right-click the warehouse zone to which you want to add dock schedules, and then click Dock Schedule.
- In the Dock Schedule grid view toolbar, click . The Add Dock Schedule dialog box appears.
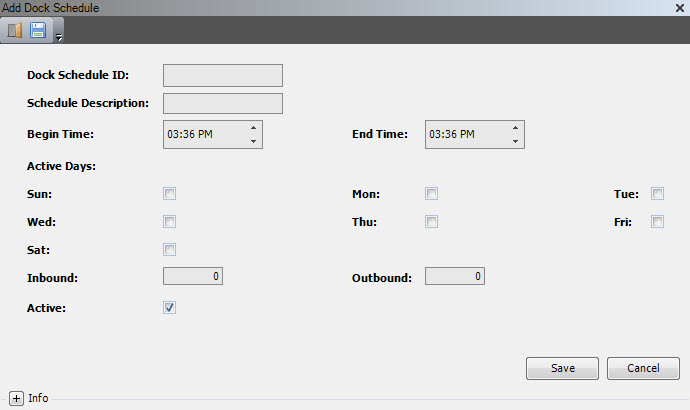
- Enter the following information.
| Field | Description | Required |
| Dock Schedule ID | Unique system code that identifies a dock schedule. | Yes |
| Schedule Description | Simple statement that defines the dock schedule. For example, if the dock schedule ID is DA DAYS, the description may be Dry area dock day shift. | Yes |
| Begin Time | Time of day that this schedule begins. | No |
| End Time | Time of day that this schedule ends. | No |
| Active Days: Sun―Sat | When selected, indicates that the dock is available for use on this day. | No |
| Inbound | Maximum number of inbound shipments that can be processed at the dock during the schedule. | No |
| Outbound | Maximum number of outbound shipments that can be processed at the dock during the schedule. | No |
| Active | When selected, indicates that the dock schedule is usable. | No |
- Click Save.
Dock schedule and warehouse zone relationships
After dock schedules are defined, you must associate the schedules with a warehouse zone. This establishes the dates that the schedule is active for the warehouse zone.
Add a dock schedule and warehouse zone relationship
- On the menu, expand Basic Data > Locations > Location Setup, and then double-click Warehouse.
- On the Warehouse window, right-click the warehouse to which you want to add dock schedules, and then click Warehouse Zone.
- In the Warehouse Zone grid view, right-click the warehouse zone to which you want to add dock schedules, and then click Warehouse Zone Dock Schedule.
- In the Warehouse Zone Dock Schedule grid view toolbar, click . The Add Warehouse Zone Dock Schedule dialog box appears.

- Enter the following information.
| Field | Description | Required |
| Warehouse Code | Unique system code that identifies a warehouse. | Display only |
| Warehouse Zone Code | Unique system code that is used in combination with the warehouse code to identify the warehouse zone. This code can be used in picking and putaway rules and when creating reports. | Display only |
| Dock Schedule | Unique system code that identifies a dock schedule. In this usage, it is the dock schedule that is associated with the specified warehouse zone code. | Yes |
| Start Date | Date and time that the dock schedule starts. | No |
| End Date | Date and time that the dock schedule ends. | No |
- Click Save.
Putaway zones
A putaway zone is a logical grouping of storage locations within a warehouse. Putaway zones can be used when configuring putaway rules and for reporting purposes. You define the putaway zones now as part of the warehouse setup, and then assign the putaway zones to locations as part of Location setup.
Add a putaway zone
- On the menu, expand Basic Data > Locations > Location Setup, and then double-click Warehouse.
- On the Warehouse window, right-click the warehouse for which you want to define putaway zones, and then click Putaway Zone.
- In the Putaway Zone grid view toolbar, click . The Add Putaway Zone dialog box appears.

- Enter the following information.

| Field | Description | Required |
| Warehouse Code | Unique system code that identifies a warehouse. | Display only |
| Putaway Zone Code | Unique system code that identifies a putaway zone. | Display only |
| Putaway Zone Desc | Simple statement that describes the putaway zone code. For example, if you are defining a putaway zone for a specific owner, the putaway zone code may be PZOWN1, and the description may be Putaway Zone for owner 1. | Yes |
| Putaway Zone Active | When selected, indicates that the zone is usable. | Yes |
- Click Save.
Picking zones
A picking zone is a logical grouping of storage locations within a warehouse. Picking zones can be used when configuring picking rules and for reporting purposes. You define the picking zones now as part of the warehouse setup, and then assign the picking zones to locations as part of Location setup.
Add a picking zone
- On the menu, expand Basic Data > Locations > Location Setup, and then double-click Warehouse.
- On the Warehouse window, right-click the warehouse for which you want to define picking zones, and then click Picking Zone.
- In the Picking Zone grid view toolbar, click . The Add Picking Zone dialog box appears.
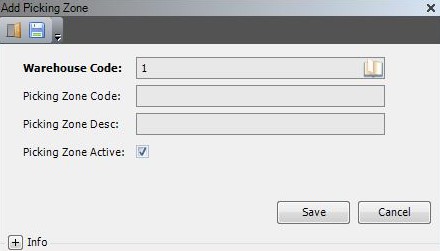
- Enter the following information.

| Field | Description | Required |
| Warehouse Code | Unique system code that identifies a warehouse. In this usage, it defaults to the selected warehouse. | Display only |
| Picking Zone Code | Unique system code that identifies a picking zone. | Yes |
| Picking Zone Desc | Simple statement that describes the picking zone code. For example, if you are defining a picking zone for a specific owner, the picking zone code may be PZOWN1, and the description may be Picking Zone for Owner 1. | Yes |
| Picking Zone Active | When selected, indicates that the zone is usable. | Yes |
- Click Save.
Replenishment zones
Replenishment zones are logical groupings of storage locations within a warehouse that require replenishment. Replenishment zones are used:
- When configuring replenishment templates to meet your replenishment scenarios.
- For reporting purposes.
When creating replenishment zones, keep in mind that all storage locations (pick locations) that will be used in the replenishment function must be linked to a replenishment zone.
Add a replenishment zone
- On the menu, in the toolbar, expand Basic Data > Locations > Location Setup, and then double-click Warehouse.
- On the Warehouse window, right-click the warehouse for which you want to define replenishment zones, and then click Replenishment Zone.
- In the Replenishment Zone grid view toolbar, click . The Add Replenishment Zone dialog box appears.
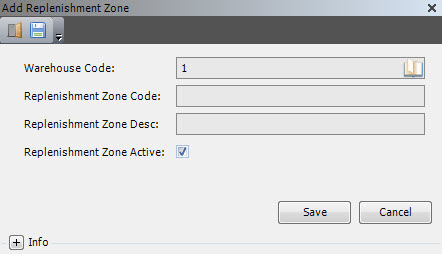
- Enter the following information.
| Field | Description | Required |
| Warehouse Code | Unique system code that identifies a warehouse. | Yes |
| Replenishment Zone Code | Unique system code that identifies a replenishment zone. | Yes |
| Replenishment Zone Desc | Simple statement that describes the replenishment zone code. For example, if you are defining a replenishment zone for a specific owner, the replenishment zone code may be PZOWN1, and the description may be Replenishment zone for owner 1. | Yes |
| Replenishment Zone Active | When selected, indicates that the zone is usable. | Yes |
- Click Save.
Equipment macro zones
Even if you do not plan to use equipment macro zones, you must set up at least one. It is a required field when defining equipment zones.
Add an equipment macro zone
- On the menu, expand Basic Data > Locations > Location Setup, and then double-click Warehouse.
- On the Warehouse window, right-click the warehouse for which you want to define equipment macro zones, and then click Equipment Macro Zone.
- In the Equipment Macro Zone grid view toolbar, click . The Add Equipment Macro Zone dialog box appears.
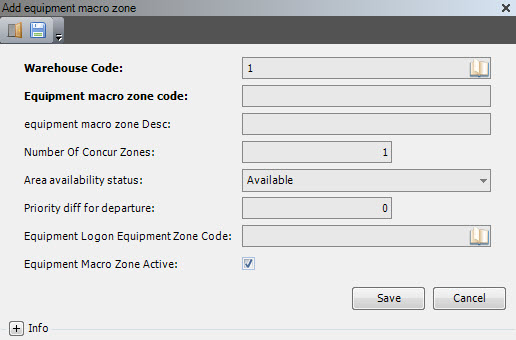
- Enter the following information.
| Field | Description | Required |
| Warehouse Code | Unique system code that identifies a warehouse. In this usage, it defaults to the selected warehouse. | Display only |
| Equipment Macro Zone Code | Unique system code that is used in combination with the warehouse code to identify the equipment macro zone. | Yes |
| Equipment Macro Zone Desc | Simple statement that defines the equipment zone code. For example, if the equipment zone code is RECE, the description may be Receiving Zone. | Yes |
| Number of Concur Zones | Currently not used. | No |
| Area Availability Status | Value that indicates if a zone is usable, unusable or occupied. | No |
| Priority Diff for Departure | Threshold for task priority differences before departure to trigger changes in task sequence or proposed task, such as task interleaving. | No |
| Equipment Logon Equipment Zone Code | Equipment zone used for logging on the equipment detail. | No |
| Equipment Macro Zone Active | When selected, indicates that the zone is usable. | Yes |
- Click Save.
Equipment zones
An equipment zone is a logical grouping of locations used to control the equipment that can perform tasks within the locations. For example, you would not want reach trucks to execute a task that takes place in a narrow aisle. By assigning only allowable equipment to the equipment zone, you prevent this type of task assignment.
You add the equipment zones now as part of the warehouse setup. Once defined, you assign the equipment zones to users (following in this section), equipment (see Equipment setup) and locations (see Location setup).
| Note | While setting up equipment zones is mandatory, equipment zones do impact task execution. To ensure efficient movement of goods throughout your warehouse, it is best to limit the number of equipment zones to those required for specific equipment and users. |
Prerequisites
To complete this procedure, you must have already set up the following data.
- Macro location structures
- Equipment macro zones
- Locations (optional)
If you have not done so, perform the setup tasks for required data first. Then, return to complete this procedure. For optional data, if you do not have it defined yet, you can return to this section later in the setup process to add that detail.
Add an equipment zone
- On the menu, expand Basic Data > Locations > Location Setup, and then double-click Warehouse.
- On the Warehouse window, right-click the warehouse for which you want to define equipment zones, and then click Equipment Zone.
- In the Equipment Zone grid view toolbar, click . The Add Equipment Zone dialog box appears.

- Enter the following information.
| Field | Description | Required |
| Warehouse Code | Unique system code that identifies a warehouse. | Display only |
| Equipment Zone Code | Unique system code that identifies an equipment zone. | Yes |
| Equipment Zone Desc | Simple statement that defines the equipment zone code. For example, if the equipment zone code is RECE, the description may be Receiving Zone. | Yes |
| Start Inbound Location Code | Unique system code that identifies a location. In this usage, it is the location within this equipment zone to which containers can be placed prior to putaway. | No |
| Start Outbound Location Code | Unique system code that identifies a location. In this usage, it is the location within this equipment zone to which containers can be placed prior to picking. | No |
| End Inbound Location Code | Currently not used. | No |
| End Outbound Location Code | Unique system code that identifies a location. In this usage, it is the location within this equipment zone to which containers can be placed after picking | No |
| Equipment Macro Zone Code | Unique system code that is used in combination with the warehouse code to identify the equipment macro zone. | Yes |
| Area Availability Status |
Value that indicates whether the equipment zone can be used. The following values are supported.
|
No |
| Equipment Zone Active | When selected, indicates that the zone is usable. | Yes |
- Click Save.
User and equipment zone relationships
After equipment zones are created, you must define the users that can work in them. You can:
- Restrict a user’s access to a specific equipment zone. (The user can only use the equipment defined for that zone.)
- Allow a user access to all equipment zones.
If a user should have access to most equipment zones, you can allow access to all and delete those that do not apply.
Prerequisites
To complete this procedure, you must have already set up the following data.
- Users
- Warehouses
- Equipment zones
If you have not done so, perform the setup tasks for required data first. Then, return to complete this procedure.
Restrict a user’s access to a specific equipment zone
- On the menu, expand Basic Data > Locations > Location Setup, and then double-click Warehouse.
- On the Warehouse window, right-click the warehouse in which the equipment zone is located, and then click Equipment Zone.
- In the Equipment Zone grid view, right-click the equipment zone to which you want to restrict a user’s access, and then click User And Zone.
- In the User And Zone grid view toolbar, click . The Add User And Zone dialog box appears.

- Enter the following information.
| Field | Description | Required |
| User Code | Unique system code that identifies a user. In this usage, it defaults to the selected user. | Display only |
| Warehouse Code | Unique system code that identifies a warehouse. In this usage, it is the warehouse for which you are defining equipment and zone usage. | Yes |
| Equipment Zone Code | Unique system code that identifies an equipment zone. In this usage, it is the equipment zone to which you want to assign the user. | Yes |
| Allowed | When selected, indicates that the user is able to work in the equipment zone. | Yes |
| Preference Number for Zone | Priority number assigned to the zone. | No |
| Preference Number for User | Priority number assigned to the user. | No |
| Priority Diff for Departure | Number that defines the how much higher in priority a task in a different work zone must be for the user to be assigned to the work. | No |
- Click Save.
Allow all users access to an equipment zone
- On the menu, expand Basic Data > Locations > Location Setup, and then double-click Warehouse.
- On the Warehouse window, right-click the warehouse for which you want to provide all users with access to an equipment zone, and then click Equipment Zone.
- In the Equipment Zone grid view, right-click the equipment zone to which you want to provide all users with access, and then click Equipment And Zone Allow All (User). The Add Equipment Zone dialog box appears.

- Verify that the value that appears in the Equipment Zone Code box is correct, and then click Confirm. The equipment zone is assigned to all users.
Allow a user access to all equipment zones
- On the menu, expand Basic Data > System > User, and then double-click User.
- On the User window, right-click the user for which you want to provide access to all equipment zones, and then click Equipment and Zone Allow All. The Equipment and Zone Allow All dialog box appears.

- Verify that the value that appears in the User Code box is correct, and then click Confirm. The user is assigned to all equipment zones that you have defined for your warehouse.
Equipment and equipment zone relationships
After equipment zones are created, you must define the equipment that can work in them. You can:
- Allow equipment access to all equipment zones.
- Restrict equipment access to a specific equipment zone.
If equipment should have access to most equipment zones, you can allow access to all and delete those that do not apply.
Prerequisites
To complete this procedure, you must have already set up the following data.
- Equipments
- Warehouses
- Equipment zones
If you have not done so, perform the setup tasks for required data first. Then, return to complete this procedure.
Restrict an equipment’s access to a specific equipment zone
- On the menu, expand Basic Data> Locations > Location Setup, and then double-click Warehouse.
- On the Warehouse window, right-click the warehouse in which the equipment zone is located, and then click Equipment Zone.
- In the Equipment Zone grid view, right-click the equipment zone to which you want to restrict a user’s access, and then click Equipment And Zone.
- In the Equipment And Zone grid view toolbar, click . The Add Equipment And Zone dialog box appears.
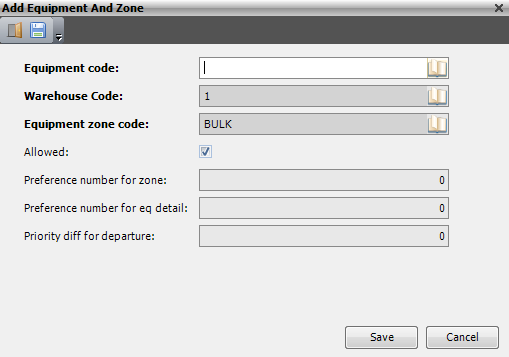
- Enter the following information.
Field Description Required Equipment Code Unique system code that identifies a piece of equipment. Display only Warehouse Code Unique system code that identifies a warehouse. In this usage, it is the warehouse for which you are defining equipment and zone usage. Yes Equipment Zone Code Unique system code that identifies an equipment zone. In this usage, it is the equipment zone to which you want to assign the user. Yes Allowed When selected, indicates that the user is able to work in the equipment zone. Yes Preference Number for Zone Priority number assigned to the zone. No Preference Number for User Priority number assigned to the user. No Priority Diff for Departure Number that defines how much higher in priority a task in a different work zone must be for the user to be assigned to the work. No
- Click Save.
Allow all equipment access to an equipment zone
- On the menu, expand Basic Data> Locations > Location Setup, and then double-click Warehouse.
- On the Warehouse window, right-click the warehouse for which you want to provide equipment with access to an equipment zone, and then click Equipment Zone.
- In the Equipment Zone grid view, right-click the equipment zone to which you want to provide equipment with access, and then click Equipment And Zone Allow All. The Add Equipment Zone dialog box appears.
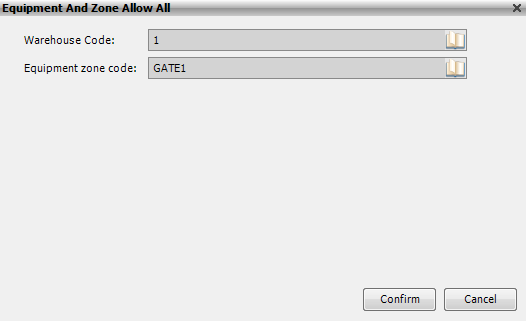
- Verify that the value that appears in the Equipment Zone Code box is correct, and then click Confirm. The equipment zone is assigned to all equipment.
Allow equipment access to all equipment zones
- On the menu, expand Basic Data> Equipments, and then double-click Equipment.
- On the Equipment window, right-click the equipment for which you want to provide access to all equipment zones, and then click Equipment and Zone Allow All. The Equipment and Zone Allow All dialog box appears.

- Verify that the value that appears in the Equipment Code box is correct, and then click Confirm. The equipment is assigned to all equipment zones that you have defined for your warehouse.
Transport areas
A transport area is a logical grouping of locations that is used to determine how goods are physically moved within your warehouse. Every location is in a transport area.
Transport areas are used to:
- Determine possible decompositions of tasks.
- Restrict the number of simultaneous arrivals and shipments for one location.
- Specify location handling defaults.
- Create procedures that define which equipment groups may move goods from one transport area to another.
Add a transport area
- On the menu, expand Basic Data > Locations > Location setup, and then double-click Warehouse.
- On the Warehouse window, right-click the warehouse to which you want to add transport areas, and then click Transport Area.
- In the Transport Area grid view toolbar, click . The Add Transport Area dialog box appears.

- Enter the following information.
| Field | Description | Required | ||||||
| Warehouse Code | Unique system code that identifies a warehouse. In this usage, it defaults to the selected warehouse. | Display only | ||||||
| Transport Area Code | Unique system code that identifies a transport area. | Yes | ||||||
| Area Desc | Simple statement that describes the transport area code. For example, if the transport area code is STAGE, the description may be Staging area. | Yes | ||||||
| Location Handling | Way in which moves to locations in this transport area must be confirmed and how locations are filled. Informational only. | Yes | ||||||
| Arrivals per Location | Value that indicates whether multiple arrivals can be started simultaneously from a dock in this transport area.
|
Yes | ||||||
| Shipments per Location | Value that indicates whether multiple shipments can be assigned simultaneously to the same dock in this transport area.
|
Yes | ||||||
| Area Active | When selected, indicates that the transport area is usable. | Yes | ||||||
| Allow Other Area |
When selected, indicates that when a task directs a user to a specific location, the user can choose another location in a different transport area. This deviation is only available for pallet move tasks.
|
Yes |
- Click Save.
Warehouse defaults
The warehouse default functionality lets you to define default values for Iptor WM1 to use during your operational processes when specific values are not otherwise available. If you support multiple owners in your warehouse, you can set default values for each owner.
Prerequisites
To complete this procedure, you must have already set up the following data.
- Warehouses
- Owners
- Locations (optional)
- Containers (optional)
- Wave templates
- Picklist templates
- Outbound templates
- Replenishment templates (optional)
- Counting templates (optional)
- Inventory status codes (optional)
- Date lists (optional)
- Putaway groups (optional)
- Picking groups (optional)
- Replenishment groups (optional)
- Business partners (optional)
If you have not done so, perform the setup tasks for required data first. Then, return to complete this procedure. For optional data, if you do not have it defined yet, you can return to this section later in the setup process to add that detail.
Add a warehouse default
- On the menu, expand Basic Data > Locations > Location setup, and then double-click Warehouse.
- On the Warehouse window, right-click the warehouse for which you want to define default values, and then click Warehouse Default.
- In the Warehouse Default grid view toolbar, click . The Add Warehouse Default dialog box appears.
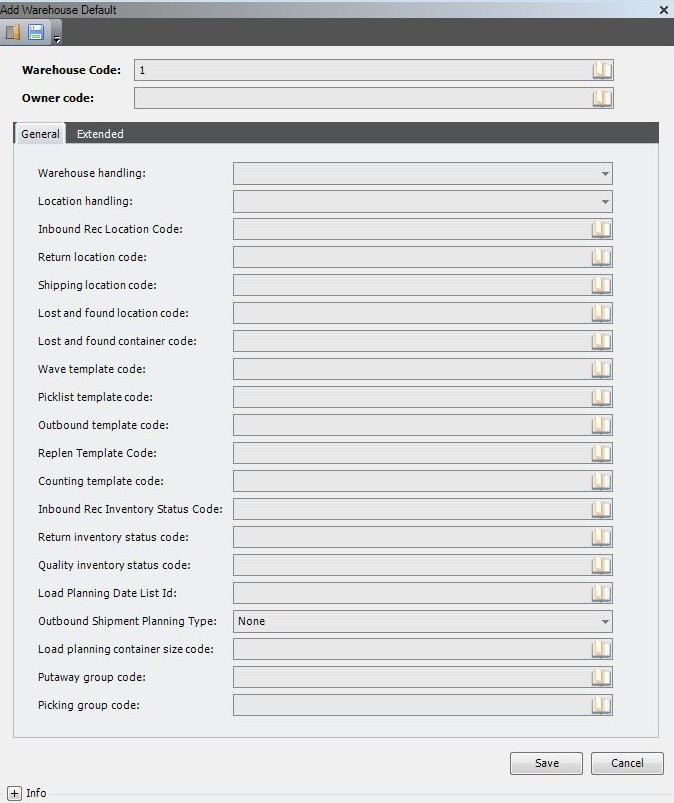
- Enter the following information.

| Field | Description | Required |
| Warehouse Code | Unique system code that identifies a warehouse. In this usage, it defaults to the selected warehouse. | Display only |
| Owner Code | Unique system code that identifies an owner. In this usage, it is the owner to which this warehouse default configuration applies. | Yes |
| Warehouse Handling | Informational only. Not used by the system. | Yes |
| Location Handling | Informational field that describes the way in which moves to the locations in this transport area must be confirmed and how locations are filled. | Yes |
| Inbound Rec Location Code | Unique system code that identifies a location. In this usage, it is the default value that is used during operational processes when a specific inbound receiving location is not otherwise available. | No |
| Return Location Code | Unique system code that identifies a location. In this usage, it is the default value that is used during operational processes when a specific return location is not otherwise available. | No |
| Shipping Location Code | Unique system code that identifies a location. In this usage, it is the default value that is used during operational processes when a specific shipping location is not otherwise available. | No |
| Lost and Found Location Code | Unique system code that identifies a location. In this usage, it is the default value that is used during operational processes when a specific lost and found location is not otherwise available. | No |
| Lost and Found Container Code | Unique system code that identifies a container. In this usage, it is the default value that is used during operational processes when a specific lost and found container is not otherwise available. | No |
| Wave Template Code | In this usage, it is the default value that is used during operational processes when a specific Wave Template Code is not otherwise available. | Yes |
| Picklist Template Code | In this usage, it is the default value that is used during operational processes when a specific Picklist Template Code is not otherwise available. | Yes |
| Outbound Template Code | In this usage, it is the default value that is used during operational processes when a specific Outbound Template Code is not otherwise available. | Yes |
| Replen Template Code | In this usage, it is the default value that is used during operational processes when a specific Replenishment Template Code is not otherwise available. | No |
| Counting Template Code | In this usage, it is the default value that is used during operational processes when a specific Counting Template Code is not otherwise available. | No |
| Inbound Rec Inventory Status Code | In this usage, it is the default value that is used during operational processes when a specific Inventory Status Code for Reception is not otherwise available. | No |
| Return Inventory Status Code | In this usage, it is the default value that is used during operational processes when a specific Inventory Status Code for Returns is not otherwise available. | No |
| Quality Inventory Status Code | In this usage, it is the default value that is used during operational processes when a specific Inventory Status Code for Quality is not otherwise available. | No |
| Load Planning Date List ID | Informational only. Not used by the system. | No |
| Putaway Group Code | In this usage, it is the default value that is used during operational processes when a specific Putaway Group Code is not otherwise available. | No |
| Picking Group Code | In this usage, it is the default value that is used during operational processes when a specific Picking Group Code is not otherwise available. | No |
- Click the Extended tab.

- Enter the following information.

| Field | Description | Required |
| Repl Group Code | In this usage, it is the default value that is used during operational processes when a specific Replenishment Group Code is not otherwise available. | No |
| Shortage Support | If this value is set, the picklist release will give an error, ‘No shortage support for picklist ‘. Only the value ‘N – *No’ is implemented. | Yes |
| Order Cross Dock Support | Informational only. Not used by the system. | Yes |
| Picklist Cross Dock Support | If a value different from NONE is selected, the system will handle cross dock allocations for shortages on picklist outbound orders with outbound order sort ‘SO’ (Sales orders). The following values are supported.
|
Yes |
| Repl Cross Dock Support | If a value different from NONE is selected, the system will handle cross dock allocations for shortages on picklist outbound orders with outbound order sort ‘RP’ (Replenishment orders). The following values are supported.
|
Yes |
| Rounding Qualifier | In this usage, it is the default value that is used during operational processes when a specific Rounding Qualifier is not otherwise available. | No |
| Internal Business Partner Code | Informational only. Not used by the system. | No |
| Arrival General Task | In this usage, it is the default value that is used during operational processes when the indication to generate tasks from an arrival is not otherwise available. | No |
| Storage Date List ID | Date list that the system uses in the handling of activity registration for owner container summary records. | No |
| Inbound Generate Task | When selected, indicates to generate tasks from an arrival of type ‘purchase reception’. | No |
| Return Generate Task | When selected, indicates to generate tasks from an arrival of type ‘customer return’. | No |
| Container Size Code | In this usage, it is the default value that is used during operational processes when a specific Container Size is not otherwise available. | No |
| Container Type Code | In this usage, it is the default value that is used during operational processes when a specific Container Type is not otherwise available. | No |
| Arrival Handle Returnable Packaging | Value that indicates if returnable packaging can be handled on arrivals. The following values are supported.
|
No |
| Shipping Handle Returnable Packaging | Value that indicates if returnable packaging can be handled on shipping bills. The following values are supported.
|
No |
| Check Partner Container Types | Concerning returnable packaging, this indicates that no relation between business partners and container types is checked at reception or shipping. The following values are supported.
|
Yes |
| Check Item Container Sizes | Concerning returnable packaging, this indicates that no relation between items and container sizes is checked at reception or shipping. The following values are supported.
|
Yes |
| Allowed Actions On If Inbound Order | Value that indicates what the incoming interface is allowed to do for inbound orders. The following values are supported.
|
Yes |
| Allowed Actions On If Outbound Order | Value that indicates what the incoming interface is allowed to do for outbound orders. The following values are supported.
|
Yes |
| Allowed Actions On If Manufacturing Order | Value that indicates what the incoming interface is allowed to do for manufacturing orders. The following values are supported.
|
Yes |
- Click Save.
Warehouse margins
Warehouse margins are the warehouse-level mechanisms within Iptor WM1 that let you define the variances that you will allow while handling the goods in your warehosue. For example, for receiving you can define variances that will allow receivers to accept more or less product when ordered quantities do not match received quantities. Or, if you are using catch weights within your logistics workflows, you can define the acceptable variances for the catch weight values that users are directed to capture.
Warehouse margins can be defined:
- By owner.
- As percentages or specific values above or below an acceptable value.
Later in the setup process, you will have the opportunity to define margins that are specific to an item.
Standard margin types
Margin types identify the warehouse process to which margins (or tolerances) can be defined. Iptor WM1 supports these standard margin types.
| Margin Type | Description |
| ARRIANN | Arrival announcement |
| ARRIVREC | Arrival reception |
| DBLUNIT | Check double unit of measure |
| DELCOMST | Deliver complete stock |
| DIRSTUPD | Direct stock update |
| MANHDCRT | Manufacturing order header creation |
| MANUFACT | Manufacturing |
| PACKVOL1 | Package calculation task volume |
| PACKVOL2 | Package calculation free volume |
| PACKWEIG | Packing weight |
| PALQUANT | Pallet quantity |
| PICKCONF | Picking confirmation |
| PICKRESV | Picking reservation |
| PURCHREC | Purchase reception |
| PURDTCRT | Purchase order detail creation |
| RETURREC | Return reception |
| WEIGHREG | Weight Registration |
Task priorities
The initial priority for a task determines the order of task execution and can increase automatically with an increment. Every period is defined in minutes and the task priority range is defined in the task priority on the warehouse.
A priority starts at 50 and decreases in increments of 5, every 5 minutes. This allows to you to manually set priorities that are lower than the automatically set minimum.
The release priority determines what templates are handled first by the picklist creation job.
Add a task priority
- On the menu, expand Basic Data > Locations > Location setup, and then double-click Warehouse.
- On the Warehouse window, right-click the warehouse to which you want to add a task priority, and then click Task Priority.
- In the Task Priority grid view toolbar, click The Add Task Priority dialog box appears.

- Enter the following information.
Field Description Required Warehouse Code Unique system code that identifies a warehouse. In this usage, it defaults to the selected warehouse. Display only Task Type Value that identifies the task type for the entered priority values. Task type, in combination with a warehouse code, determines the priority range to which automatic priority updates by processes apply. Yes Min Auto Priority Lowest value (highest priority) that may be attributed to the current priority of a task detail by a process for automatic priority updates. Yes Max Auto Priority Highest value (lowest priority) that may be attributed to the current priority of a task detail by a process for automatic priority updates. Yes - Click Save.
Macro locations
A macro location is used to manage a grouping of locations based on actual container size in the locations. Macro locations have a structure. The structure detail shows which locations can be used for a certain container size. For example, once there is one pallet in a macro location, all other places in the macro location are filled with the same container size as the first pallet.
Add a macro location
- On the menu, expand Basic Data > Locations > Location setup, and then double-click Warehouse.
- On the Warehouse window, right-click the warehouse to which you want to add a macro location, and then click Macro Location.
- In the Macro Location grid view toolbar, click . The Add Macro Location dialog box appears.

- Enter the following information.
Field Description Required Warehouse Code Unique system code that identifies a warehouse. In this usage, it defaults to the selected warehouse. Display only Macro Location Code Unique location code that identifies the macro location. Each macro location is defined by a combination of the warehouse code and the macro location code. Yes Macro Location Structure Code Structure code for this macro location. The macro location structure code is checked against the macro location structure table below. Yes Cur Container Size Code Value that defines the size of the container at the current macro location. No - Click Save.
