
Contents
- 1 Introduction
- 2 Location groups
- 3 Location sizes
- 4 Location types
- 5 Location type outbound
- 6 Location classes
- 7 Macro location structures
- 8 Locations
- 9 Location commodities
- 10 Conveyances
- 11 Location and location type relationships
- 12 Commodities
- 13 Location and commodity relationships
- 14 Dock schedules
- 15 Input output stations
Introduction
This guide explains how to identify and provide specific details about locations.
Basic data
In this guide you will learn how to set up the following data.
- Location groups
- Location sizes
- Location types
- Location type outbound
- Location classes
- Macro location structures
- Locations
- Location commodities
- Conveyances
- Location and location type relationships
- Commodities
- Location and commodity relationships
- Dock schedules
- Input output stations
Location groups
A location group is a set of locations that store goods of a certain product group and type (such as cooling, freezing and high value). A general location group (GENERAL) can be defined that allows storage of all goods, which is useful for receiving locations, storage locations, locations on equipment and dock locations.
A location group can be linked to one or more product location groups to restrict functionality. A product location group defines the products, considered as a group, to be stored in locations. Typically, all product groups belong to the product location group GENERAL.
For every location group, you can indicate whether a location in the location group can allow multiple owners, items, stock products and handling units.

Location group examples
The following scenarios could require separate location groups.
- General Location Group – Locations where you want to allow all items, such as receiving locations, storage locations, locations on equipment and dock locations.
- Special Location Groups – Locations where you want to store non-inventory items, such as packaging materials.
- Single Owner Location Group – Locations where you are not allowed to mix owners.
- Single Item Location Group – Locations where you are not allowed to mix items.
Add a location group
- On the menu, expand Basic Data > Locations > Location Parameters, and then double-click Location Group.
- On the Location Group window, in the toolbar, click
 . The Location Group dialog box appears.
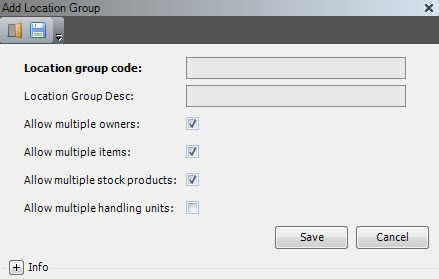
- Enter the following information.
| Field | Description | Required |
| Location Group Code | Unique system code that identifies a location group. A location group is a set of locations that store goods of a certain product group and type. | Yes |
| Location Group Desc | Simple statement that defines the location group. For example, if the location group code is GRG, the description may be Garage. | Yes |
| Allow Multiple Owners | When selected, indicates that product from multiple owners is allowed in the location. | No |
| Allows Multiple Items | When selected, indicates that multiple items are allowed in the location. | No |
| Allow Multiple Stock Products | When selected, indicates that multiple stock products are allowed in the location. | No |
| Allow Multiple Handling Units | When selected, indicates that multiple handling units are allowed in the location. | No |
- Click Save.
Location sizes
Location size is used to maximize the use of the warehouse space through accurate storing of containers and pallets in the most appropriate location. Location size is important to indicate which containers can be stored (based on their container size) and how many containers can be stored.
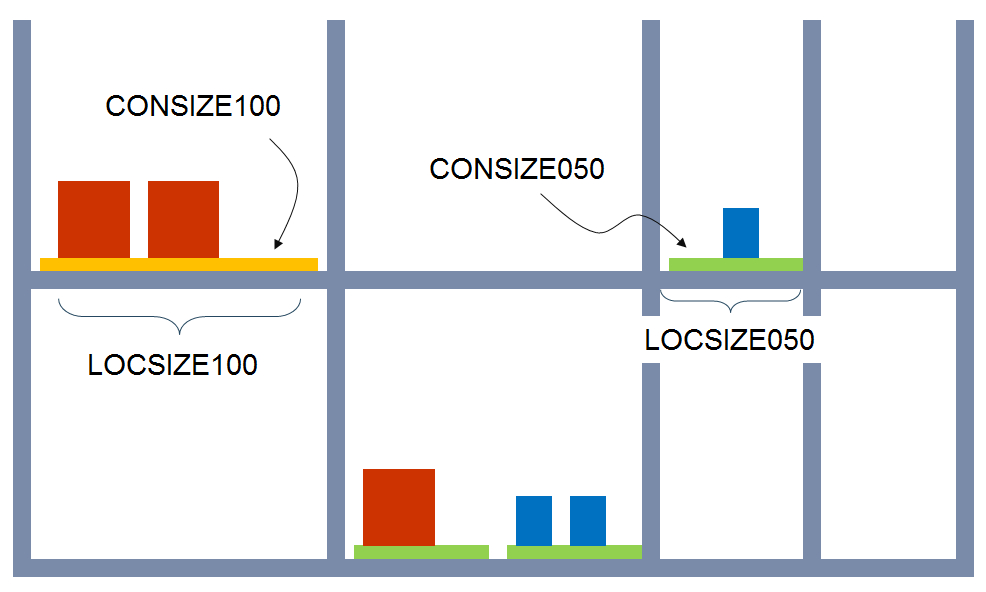
Dimensions can be used in customizations and in put-away rules to fine tune put-away. You can define inner and outer dimensions (volume, width, depth, and height).
Add a location size
- On the menu, expand Basic Data > Locations > Location Parameter, and then double-click Location Size.
- On the Location Size window, in the toolbar, click . The Add Location Size dialog box appears.
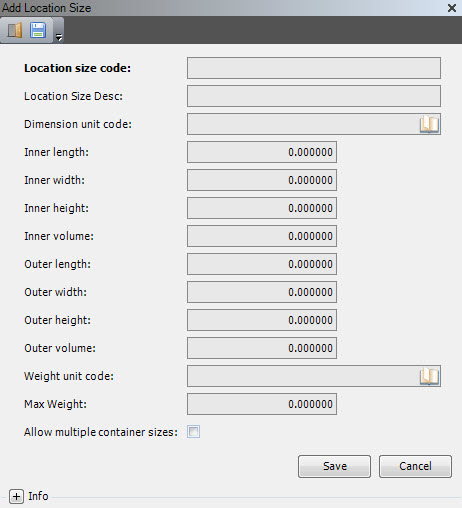
- Enter the following information.
| Field | Description | Required |
| Location Size Code | Unique system code that identifies a location size. Container sizes can refer to a location size code. | Yes |
| Location Size Desc | Simple statement that defines the location size. For example, if the location size code is PICK, the description may be Pick locations. | No |
| Dimension Unit Code | Unit code of the dimensions of the location size. | No |
| Inner Length | Inner length of a location of the specified size. Informational only. | No |
| Inner Width | Inner width of a location of the specified size. Informational only. | No |
| Inner Height | Inner height of a location of the specified size. Informational only. | No |
| Inner Volume | Inner volume of a location of the specified size. Informational only. | No |
| Outer Length | Outer length of a location of the specified size. Informational only. | No |
| Outer Width | Outer width of a location of the specified size. Informational only. | No |
| Outer Height | Outer height of a location of the specified size. Informational only. | No |
| Weight Unit Code | Unit code of the weight that the location size can contain. | No |
| Max Weight | Maximum weight that may be stored in a location of the specified location size. Informational only. | No |
| Allow Multiple Container Sizes | When selected, indicates that containers of different container sizes may be stored in a location of the specified size. | No |
- Click Save.
Location types
The location type specifies how the location is used, which is what allows specific transactions to be performed in the location, such as receiving, SKU (piece) picking and shipping. Once location types are defined, you can assign primary and secondary location types to a location. For example, a pick location must always have a primary location type of PICK, but if you confirm delivery and receive goods in the same location, then that location must also have secondary location types of DOCK and ARRIVAL.
Add a location type
- On the menu, expand Basic Data > Locations > Location Parameter, and then double-click Location Type.
- On the Location Type window, in the toolbar, click . The Add Location Type dialog box appears.
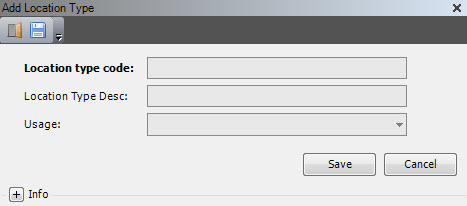
- Enter the following information.
| Field | Description | Required |
| Location Type Code | Unique system code that identifies a location type. This value identifies which logistic flows pertain to a location (for example, Dock, Transit, Shipping, Receiving, Cross Docking). |
Yes |
| Location Type Desc | Simple statement that defines the location type. For example, if the location type code is PDOCK, the description may be Preparation dock. | Yes |
| Usage |
Value that indicates how the location is used / which specific transactions can be performed. The following values are supported.
|
Yes |
- Click Save.
Location type outbound
Location type outbound defines the logistic use of a picking (docking) location.
Add a location type outbound
- On the menu, expand Basic Data > Locations > Location Parameter, and then double-click Location Type Outbound.
- On the Location Type Outbound window, in the toolbar, click . The Add Location Type Outbound dialog box appears.

- Enter the following information.
| Field | Description | Required |
| Primary Location Type Code | Location type code for these definitions. | Yes |
| Number of Owners | Number of owners that are allowed on one location attributed with this primary location type code. | No |
| Number of Business Partners | Number of business partners that are allowed on one location attributed with this primary location type code. | No |
| Number of Business Partner Addresses | Number of business partner addresses that are allowed on one location attributed with this primary location type code. | No |
| Number of Transport Companies | Number of transport companies that are allowed on one location attributed with this primary location type code. | No |
| Number or Picklists | Number of picklists that are allowed on one location attributed with this primary location type code. | No |
| Number of Shipping Bills | Number of shipping bills that are allowed on one location attributed with this primary location type code. | No |
| Putaway Group Code | Unique system code that identifies a putaway group. Putaway groups are used by the putaway logic in Iptor WM1. The putaway group can be defined on the arrival detail, stock product/item, product location group and/or warehouse default and is the stakeholder for the putaway rules to be used. In this usage, it will be used for retrieving the docking location. | No |
- Click Save.
Location classes
Location classes can be linked to locations.
On the company level, a putaway and a receiving location class code can be defined.
On a product location group, a receiving location class code can be defined.
On an equipment group, a tasklist location class code can be defined.
On equipment, a location class code can be defined.
The location class code is in the tasklist header.
Add a location class
- On the menu, expand Basic Data > Locations > Location Parameter, and then double-click Location Class.
- On the Location Class window, in the toolbar, click . The Add Location Class dialog box appears.
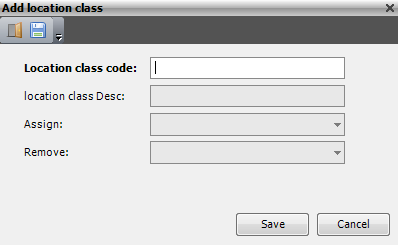
- Enter the following information.
| Field | Description | Required |
| Location Class Code | Unique system code that identifies a location class. | Yes |
| Location Class Descr | Description of the location class. | Yes |
| Assign |
Value that indicates how this class is assigned. The following values are supported.
|
Yes |
| Remove |
Value that indicates how this class is removed. The following values are supported.
|
Yes |
- Click Save.
Macro location structures
Macro locations are used to manage grouping of locations based on actual container size on the locations.
A macro location has a structure. The structure detail shows which locations in the macro location can be used for a certain container size. Once there is one pallet in the macro location, all other places in the macro location will be filled with the same container size as the first pallet.
Add a macro location structure
- On the menu, expand Basic Data > Locations > Location Parameter, and then double-click Macro Location Structure.
- On the Macro Location Structure window, in the toolbar, click . The Add Macro Location Structure dialog box appears.
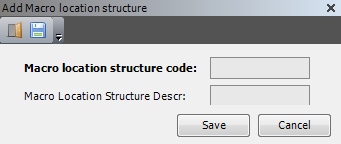
- Enter the following information.
| Field | Description | Required |
| Macro Location Structure Code | Structure used for macro locations. | Yes |
| Macro Location Structure Descr | Description of the macro location structure. | Yes |
- Click Save.
Locations
A location is a uniquely identified position within a facility where product is stored, staged and manipulated. All locations in a facility must be defined.
Every location is situated in a warehouse, transport area and equipment zone. In addition, a location can be placed in a warehouse zone, put-away zone, picking zone and replenishment zone.
A warehouse typically consists of many locations, each with its own characteristics such as size, type, group and zones.
Prerequisites
To complete this procedure, you must have already set up the following data.
- Warehouses
- Macro location structures
- Equipment zones
- Equipment macro zones
- Transport areas
- Warehouse zones (optional)
- Putaway zones (optional)
- Picking zones (optional)
- Replenishment zones (optional)
- Containers
If you have not done so, perform the setup tasks for required data first. Then, return to complete this procedure. For optional data, if you do not have it defined yet, you can return to this section later in the setup process to add that detail.
Add a location
- On the menu, expand Basic Data > Locations > Location Setup, and then double-click Location.
- On the Location window, in the toolbar, click . The Add Location dialog box appears.
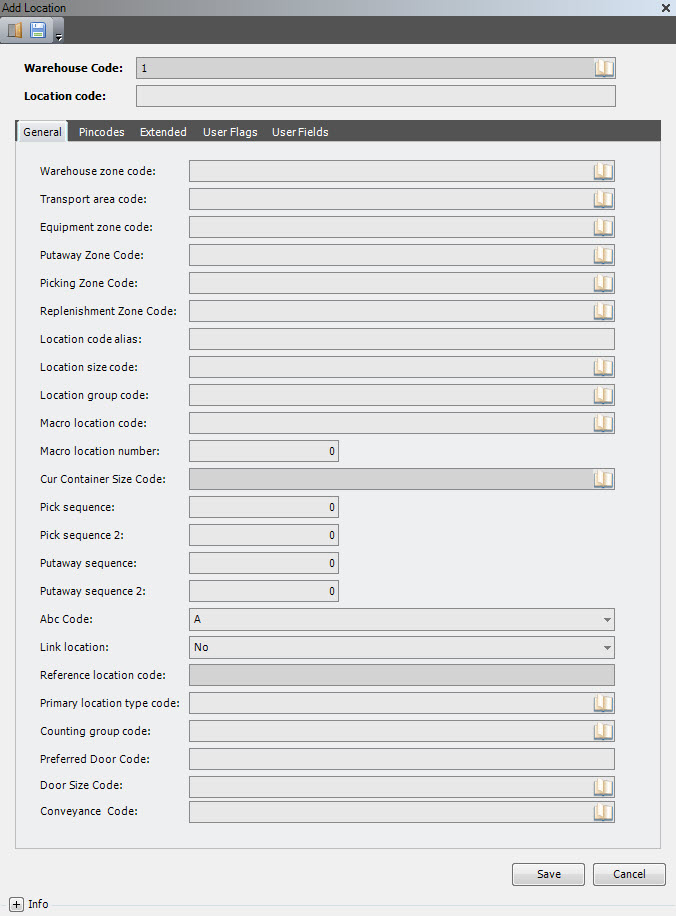
- Enter the following information.
| Field | Description | Required |
| Warehouse Code | Unique system code that identifies a warehouse. In this usage, it is the warehouse where the location is defined. | Display only |
| Location Code | Unique system code that identifies a location. In this usage, it is the combination of the warehouse code and location code that identifies a location in a unique way. The same location code can be used in several warehouses, as the system considers these as separate locations. It is recommended to use the same character length for all location codes for scanning purposes. | Yes |
| Warehouse Zone Code | Unique system code that is used in combination with the warehouse code to identify the warehouse zone. This code can be used in picking and putaway rules and when creating reports. In this usage, the warehouse zone code can be used to logically group locations within a warehouse, which can be useful for inquiries and reports. | No |
| Transport Area Code | Unique system code that identifies a transport area. In this usage, it determines the way locations are handled during task execution, whether location codes must be entered or simply confirmed, and whether the location capacity is automatically treated by the system, or if a location must be manually confirmed as full. It is also a key element for the internal transport procedure route. | Yes |
| Equipment Zone Code | Unique system code that identifies an equipment zone. In this usage, it is necessary when task scheduling is used in the system, as the equipment zone determines the equipment details that can be used and that may be combined within the same zone. | Yes |
| Putaway Zone Code | Unique system code that identifies a putaway zone. In this usage, it can be used to logically group locations within a warehouse, especially for the putaway process. | No |
| Picking Zone Code | Unique system code that identifies a picking zone. In this usage, it can be used to logically group locations within a warehouse, especially for the picking process. | No |
| Replenishment Zone Code | Unique system code that identifies a replenishment zone. In this usage, it can be used to logically group locations within a warehouse, especially for the replenishment process. | No |
| Location Code Alias | Alternative unique identification for a location. Location codes normally have a mnemonic signification and are used for display on screens and reports. To ensure that correct locations are scanned, a location code alias can be used without any logical content. | No |
| Location Size Code | Unique system code that identifies a location size. In this usage, the location size determines the container sizes that are allowed on a location. The relation between pallet sizes and location sizes also implies a preference and a capacity in terms of number of pallets. | Yes |
| Location Group Code | Unique system code that identifies a location group. A location group is a set of locations that store goods of a certain product group and type. In this usage, the location group specifies if more than one item or stock product is allowed on a location. The location group code determines the stock products that are allowed on a location (for example, to be used for dangerous goods, frozen goods, etc.). The relationship between product location groups and location groups also implies a preference. | Yes |
| Macro Location Code | Unique system code that identifies a macro location. Some putaway algorithms support the use of macro locations, which is a grouping of several locations. | No |
| Macro Location Number | Number that identifies a specific location within the macro location. Each macro location has a macro location structure, with numbers referring to specific locations. | No |
| Cur Container Size Code | Unique system code that identifies a container size. In this usage, when macro locations are used, the current container size is updated when a container is put on a location that is part of a macro location. | No |
| Pick Sequence | Number that specifies the route to follow during picking. It can be used on picklist creation to determine pick task sequence. | No |
| Pick Sequence 2 | Currently not used. | |
| Putaway Sequence | Number that specifies the path to follow during putaway. It can be used when creating putaway tasks after goods receiving. It can also be used in the putaway algorithm to find a suitable location. | No |
| Putaway Sequence 2 | Currently not used. | No |
| ABC Code | A to Z value that is used to group locations for reporting purposes. | No |
| Link Location | Value that indicates whether this location is allowed to be linked by length with other locations to form one larger location. Valid values are L (By length) and NO (No). When linked by length, the outer lengths from the location size are added. These locations must have the same aisle and altitude, and consecutive stack numbers. Locations that are allowed to be linked are not allowed to be used in a macro location, and vice versa. | No |
| Reference Location Code | Unique system code that identifies a location. In this usage, when locations are linked together, this is the first location of the chain. Other locations of the chain are considered full. | No |
| Primary Location Type Code | Unique system code that identifies a location type. This value identifies which logistic flows pertain to a location (for example, Dock, Transit, Shipping, Receiving, Cross Docking). In this usage, it is the primary location type for those functions that require it, such as receiving, piece picking and packing. Selecting a primary location type automatically creates a record in the relation table location and location type. In this table, you can link extra location types to the location. |
No |
| Counting Group Code | Unique system code that identifies a counting group. The counting group is used for inline counting and can be defined on item, item pick location management or on location. | No |
| Preferred Door Code | Unique system code that identifies a door. In this usage, it is the preferred door for those functions that require it. | No |
| Door Size Code | Unique system code that identifies a door size. | No |
| Conveyance Code | Unique system code that identifies conveyance. | No |
- Click the Pin Codes tab.
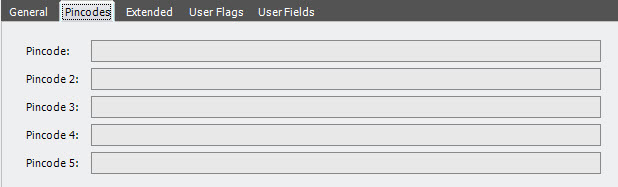
- Enter the following information.
| Field | Description | Required |
| Pincode | Non-unique attribute that is used to confirm tasks, if the location confirmation allows. When the corresponding pincode for a location is entered, the system assumes that the correct location has been taken. | No |
| Pincode 2–5 | Additional attributes that can be used to confirm tasks, if the location confirmation allows. | No |
- Click the Extended tab.
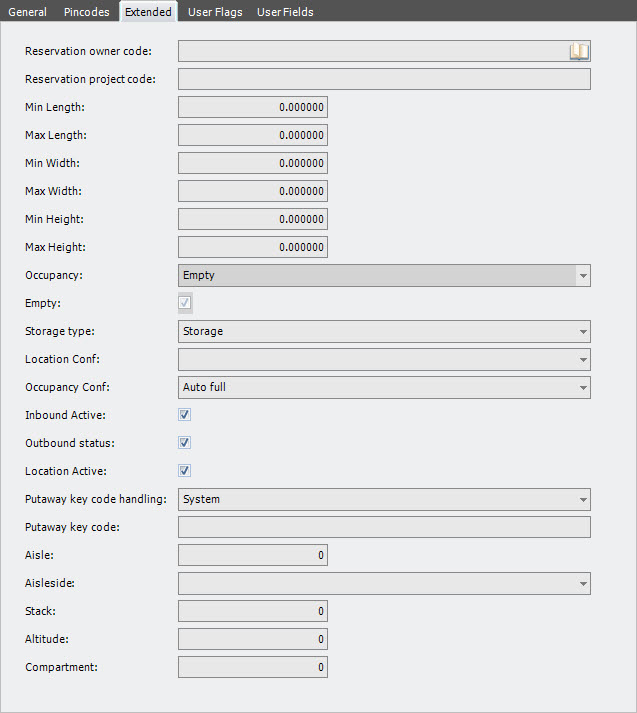
- Enter the following information.
Field Description Required Reservation Owner Code Unique system code that identifies an owner. In this usage, it is used to restrict inventory reservations. No Reservation Project Code Unique system code that identifies a project and is used to restrict inventory reservations. No Min Length When several locations are linked together by length, this identifies the minimum length required for containers to be allowed on the location chain. It is calculated based on the maximum length and a fixed length margin or margin percentage. No Max Length When several locations are linked together by length, this identifies the maximum length required for containers to be allowed on the location chain. It is the sum of the outer lengths from the location sizes of all the locations in the chain. No Min Width Currently not used. No Max Width Currently not used. No Min Height Currently not used. No Max Height Currently not used. No Occupancy Number that indicates the current occupancy of the location. This is updated by the system as tasks are performed. A location is considered as not occupied when there are no containers (including empty containers) on that location, and also no reservations for that location due to active tasks. Such a location has occupancy 0. A location that is not full or empty, has an occupancy of 5. Once a location is full in terms of pallets (through capacity calculation or by manual intervention), it has an occupancy is 9. The occupancy is updated by the system when tasks are performed. No Empty When selected, indicates that there is no inventory on the location. No Storage Type Value that indicates whether the location is used for storage (0) or transit (9). A transit location is intended for temporary use only (for instance as an intermediate location when the transport of a pallet is done in different steps) and is not proposed by the system as a putaway location. A transit location is also not considered for picking, unless there is a fixed allocation of goods. No Location Conf Value that specifies whether a location code, alias or pincode must be entered when a task is performed. A location code and alias are unique in a warehouse, whereas pincodes are not. Random pincode entering is normally managed by a pick-to-light system. The following values are supported. - 2 – Pin entering random 1-2
- 3 – Pin entering random 1-3
- 4 – Pin entering random 1-4
- 5 – Pin entering random 1-5
- A – Alias entering
- E – Mandatory entering
- I – Pin entering
- P – Confirm proposal
Yes Occupancy Conf Attribute that describes how the location becomes full. The following values are supported. - A – Auto full
- S – Semi-auto full
- M – Manual full
No Inbound Active When selected, indicates that the location is available for inbound functions. No Outbound Status When selected, indicates that the location is available for outbound functions. No Location Active When selected, indicates that the location has a status of active. No Putaway Key Code Handling Value that can be used by some calculation methods during the calculation of a putaway location. It can also be used by customer-specific applications to fit special putaway methods into the standard calculation methods. No Putaway Key Code Value that can be used by some calculation methods during the calculation of a putaway location. It can also be used by customer-specific applications to fit special putaway methods into the standard calculation methods. No Aisle Number identifying the aisle that contains this location. This can be necessary when using automatic equipment that must be guided. No Aisle Side Value that indicates the side of the aisle that contains this location. The following values are supported. - Blank – not applicable
- L – left
- R – right
No Stack Number identifying the stack or column that contains this location. The stacks can be numbered throughout the whole warehouse or within an aisle. No Altitude Number identifying the level of the shelf within a stack that contains this location. No Compartment Number identifying the compartment that contains this location. The aisle, stack and altitude can determine one unique location coordinate, or it can determine a complete shelf. In the latter case, a compartment number can be used to obtain a unique location coordinate. No
- Click the User Flags tab.
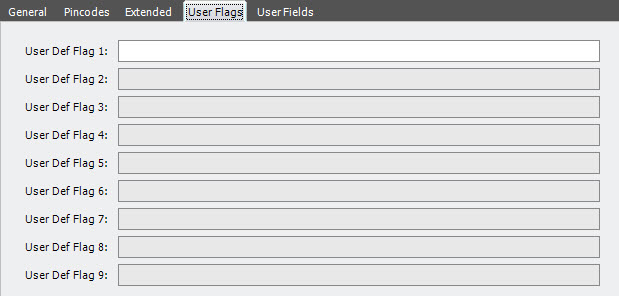
- Enter the following information.
| Field | Description | Required |
| User Defined Flag 1–9 | Reserved for customer-specific needs. | No |
- Click the User Fields tab.

- Enter the following information.
| Field | Description | Required |
| User Def Field 1–2 | Reserved for customer-specific needs. | No |
- Click Save.
Location commodities
Commodities can be linked to loactions.This link is used in the inbound and outbound autoplan function of yard management.
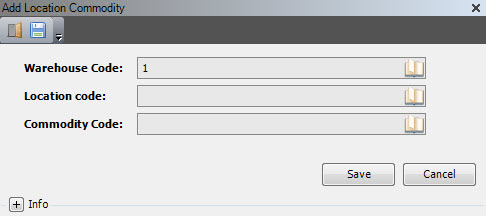
Add a location commodity
- On the menu, expand Basic Data > Locations > Location Parameter, and then double-click Location Commodity.
- On the Location Commodity window, in the toolbar, click . The Add Location Commodity dialog box appears.

- Enter the following information.
| Field | Description | Required |
| Warehouse Code | Unique system code that identifies a warehouse. | Yes |
| Location Code | Unique system code that identifies a location. | Yes |
| Commodity Code | Unique system code that identifies a commodity. |
Yes |
- Click Save.
Conveyances
A conveyance is an internal conveyor system used to transport goods within the warehouse.
Add a conveyance
- On the menu, expand Basic Data > Locations > Location Setup, and then double-click Conveyance.
- On the Conveyance window, in the toolbar, click . The Add Conveyance dialog box appears.

- Enter the following information.
| Field | Description | Required |
| Conveyance Code | Unique system code that identifies conveyance. | Yes |
| Conveyance Description | Simple statement that defines the conveyance. For example, if the conveyance code is RF, the description may be Refrigerated. | Yes |
| Schema Owner | Refers to where the data record originates. Iptor WM1 comes standard with the schema owner dbo. To distinguish customer specific entries, a customer schema can be used. The value of the customer schema is defined in the database and configured within Iptor WM1. It corresponds to the schema used when accessing the SQL database. The following values are supported.
The standard naming convention for a customer specific value is a combined abbreviation of the customer name and install location. For example, CompanyABC installed in location CityXYZ could be comcit. |
Yes |
- Click Save.
Location and location type relationships
Once locations and location types are created, you must link each location with a location type to identify the location’s logistic use. Some functionality requires a location type with a specific usage, such as receiving, arrival, packing and dock; however, a location can have multiple location types assigned, such as picking and shipping.
For example, a location can have primary location type to use for receiving (R). But that same location should also have a location type to use on arrival header, inbound and detail (A).
Add a location and location type relationship
- On the menu expand Basic Data > Locations > Location Setup, and then double-click Location and Location Type.
- On the Location and Location Type window, in the toolbar, click .The Add Location and Location Type dialog box appears.
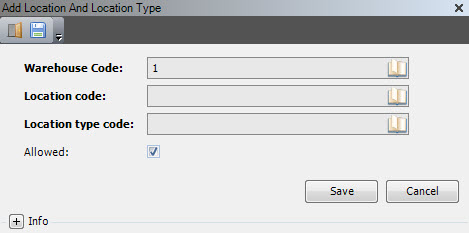
- Enter the following information.
| Field | Description | Required |
| Warehouse Code | Unique system code that identifies a warehouse. | Display only |
| Location Code | Unique system code that identifies a location. | Yes |
| Location Type Code | Unique system code that identifies a location type. This value identifies which logistic flows pertain to a location (for example, Dock, Transit, Shipping, Receiving, Cross Docking). |
Yes |
| Allowed | When selected, indicates that the specified location type is allowed for the specified location. | Yes |
- Click Save.
Commodities
If your facility tracks commodities in the yard, you must add those, and then assign the commodities to locations.
If desired, you can also define as commodities those goods that are used within the yard but not tracked as product, such as pallets. When not in use within the warehouse, these commodities must be stored. Therefore, after you assign commodities to these locations in this section, you assign them to storage containers (see Add storage containers).
Add a commodity
- On the menu, expand Basic Data > Locations > Location Setup, and then double-click Commodity.
- On the Commodity window, in the toolbar, click . The Add Commodity dialog box appears.
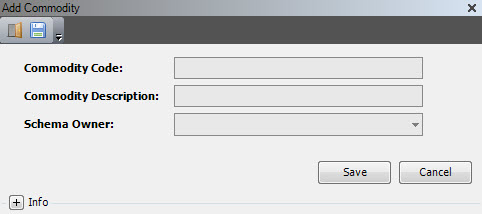
- Enter the following information.
| Field | Description | Required |
| Commodity Code | Unique system code that identifies a commodity. |
Yes |
| Commodity Description | Simple statement that defines the commodity. For example, if the commodity code is CHEP, the description may be CHEP pallets. | Yes |
| Schema Owner | Refers to where the data record originates. Iptor WM1 comes standard with the schema owner dbo. To distinguish customer specific entries, a customer schema can be used. The value of the customer schema is defined in the database and configured within Iptor WM1. It corresponds to the schema used when accessing the SQL database. The following values are supported.
The standard naming convention for a customer specific value is a combined abbreviation of the customer name and install location. For example, CompanyABC installed in location CityXYZ could be comcit. |
Yes |
- Click Save.
Location and commodity relationships
The combination of a warehouse code, location code and commodity code form a location commodity. Once commodities are added, you must set up the location commodities to identify the locations where commodities can be stored.
Add a location and commodity relationship
- On the menu, expand Basic Data > Locations > Location Setup, and then double-click Location Commodity.
- On the Location Commodity window, in the toolbar, click . The Add Location Commodity dialog box appears.
- Enter the following information.
| Field | Description | Required |
| Warehouse Code | Unique system code that identifies a warehouse. In this usage, it defaults to the selected warehouse. | Display only |
| Location Code | Unique system code that identifies a location. In this usage, select a location with the equipment zone of DOCK. | Yes |
| Commodity Code | Unique system code that identifies a commodity. |
Yes |
- Click Save.
Dock schedules
Dock schedules are used in the auto plan function of yard management. A dock schedule can be used for inbound and or outbound. It can be defined with a start and end time, and an indication of the days of the week that the schedule can be used. A dock schedule can be linked to one or more warehouse zones.
Add a dock schedule
- On the menu, expand Basic Data > Locations > Location Setup, and then double-click Dock Schedule.
- On the Dock Schedule window, in the toolbar, click . The Add Dock Schedule dialog box appears.
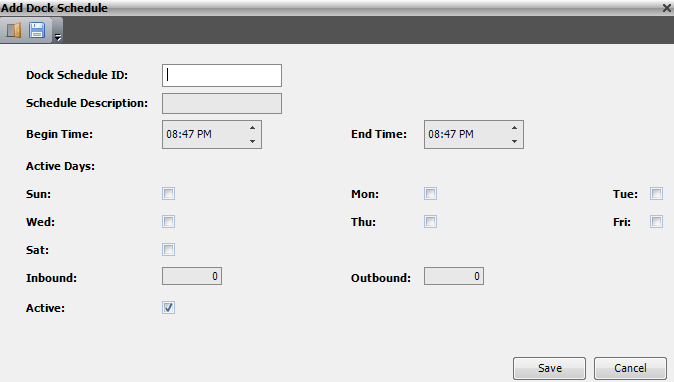
- Enter the following information.
| Field | Description | Required |
| Dock Schedule ID | Unique system code that identifies a dock schedule. Dock schedules are used in the auto plan function of yard management. | Yes |
| Schedule Description | Simple statement that defines the dock schedule. For example, if the dock schedule is WORKDAY, the description may be Working days. | Yes |
| Begin Time | Starting time of the schedule | Yes |
| End Time | Ending time of the schedule | Yes |
| Active Days (Sun – Fri) | When selected, indicates the days of the week that the schedule can be used. | No |
| Inbound | Indication that the schedule can be used for inbound. | No |
| Outbound | Indication that the schedule can be used for outbound. | No |
| Active | When selected, indicates that the schedule is active. | Yes |
- Click Save.
Input output stations
Input output stations are available for project specific customizations for customers that use automated equipment handling systems. For example, an input output station can be used to interface with barcode scanners that are part of conveyors and allows you to confirm pallet tasks, perform pallet moves or create pallet tasks for the scanned container. It can also identify the “sender” of the request for logging purposes.
Add an input output station
- On the menu, expand Basic Data > Locations > Location Parameter, and then double-click Input Output Stations.
- On the Input Output Stations window, in the toolbar, click . The Add Input Output Stations dialog box appears.
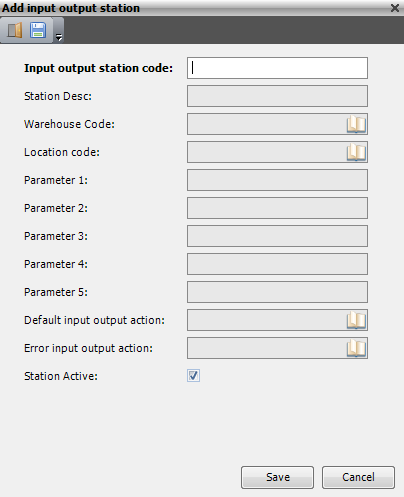
- Enter the following information.
| Field | Description | Required |
| Input Output Station Code | Unique system code that identifies a piece of material handling equipment, such as a container scanner along a line. | Yes |
| Station Desc | Simple statement that defines the input output station. For example, if the input output station code is SC01, the description may be Scanner at line 01. | No |
| Warehouse Code | Unique system code that identifies a warehouse. | No |
| Location Code | Unique system code that identifies a location. | No |
| Parameter 1 | Reserved for future use. | No |
| Parameter 2 | Reserved for future use. | No |
| Parameter 3 | Reserved for future use. | No |
| Parameter 4 | Reserved for future use. | No |
| Parameter 5 | Reserved for future use. | No |
| Default Input Output Action | Reserved for future use. | No |
| Error Input Output Action | Reserved for future use. | No |
| Station Active | When selected, indicates that the input output station is active. | Yes |
- Click Save.
