
Contents
Introduction
This guide explains how to identify and provide specific details about the transportation methods and processes that are implemented in the inbound and outbound functions of your warehouse.
Basic data
In this guide you will learn how to set up the following data.
- Vehicle types
- Vehicles
- Manner of transport
- Terms of delivery
- Terms of payment
- Damage codes
Vehicle types
Vehicle types are used to group vehicles. For example, a vehicle type can be a truck, train, etc.
Add a vehicle type
- On the menu, expand Basic Data > System > Transport, and then double-click Vehicle Type.
- On the Vehicle Type window, in the toolbar, click
 . The Add Vehicle Type dialog box appears.

- Enter the following information.
| Field | Description | Required |
| Vehicle Type Code | Unique system code that identifies a vehicle type. | Yes |
| Vehicle Type Desc | Simple statement that defines the vehicle type. For example, if the vehicle type code is TR, the description may be Truck. | Yes |
| Min Weight | Minimum weight that vehicles of this vehicle type can accommodate. | No |
| Max Weight | Maximum weight that vehicles of this vehicle type can accommodate. | No |
| Min Length | Minimum length that vehicles of this vehicle type can accommodate. | No |
| Max Length | Maximum length that vehicles of this vehicle type can accommodate. | No |
| Min Width | Minimum width that vehicles of this vehicle type can accommodate. | No |
| Max Width | Maximum width that vehicles of this vehicle type can accommodate. | No |
| Min Height | Minimum height that vehicles of this vehicle type can accommodate. | No |
| Max Height | Maximum height that vehicles of this vehicle type can accommodate. | No |
| Min Volume | Minimum volume that vehicles of this vehicle type can accommodate. | No |
| Max Volume | Maximum volume that vehicles of this vehicle type can accommodate. | No |
- Click Save.
Vehicles
Vehicles are used in inbound and outbound functions, for example for the definition of owner or carrier trucks, trains (wagons), etc. They are not to be confused with the equipment used in the warehouse to execute tasks for container or inventory moves (for example, forklift trucks, cranes and conveyors).
Vehicles can be given attributes that can be printed on external documents.
Add a vehicle
- On the menu, expand Basic Data > System > Transport, and then double-click Vehicle.
- On the Vehicle window, in the toolbar, click . The Add Vehicle dialog box appears.

- Enter the following information.
| Field | Description | Required |
| Vehicle Code | Unique system code that identifies a vehicle. | Yes |
| Vehicle Desc | Simple statement that defines the vehicle. For example, if the vehicle code is VEH001, the description may be Acme Transport Company vehicle. | No |
| Vehicle Type Code | Unique system code that identifies a vehicle type. | No |
| License Plate | Registration identifier for the vehicle. | No |
| Warehouse Code | Unique system code that identifies a warehouse. In this usage, if the vehicle is to be restricted to a specific warehouse, then it is the warehouse for which directed work is to be assigned to the vehicle. | No |
| Location Code | Unique system code that identifies a location. | No |
| Vehicle Status |
Value that identifies the current work status for the vehicle. The following values are supported.
|
No |
| Vehicle Active | When selected, indicates that the vehicle is available for use within the warehouse inbound and outbound functions. | No |
| Fixed Container Code | Unique system code that identifies a container. In this usage, it is the container (which must have a usage of Vehicle) that identifies the exact location of the vehicle. | No |
- Click Save.
Manner of transport
If your reports and documentation require that the manner of transport is identified, then complete the following procedure to add the transport data.
Add a manner of transport
- On the menu, expand Basic Data > System > Transport, and then double-click Manner of Transport.
- On the Manner of Transport window, in the toolbar, click . The Add Manner of Transport dialog box appears.
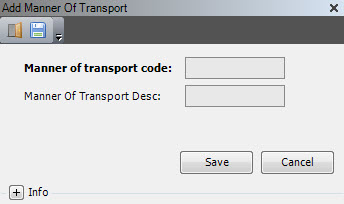
- Enter the following information.
| Field | Description | Required |
| Manner of Transport Code | Unique system code that identifies a transportation method. | Yes |
| Manner of Transport Desc | Simple statement that defines the transportation method. For example, if the manner of transport code is PRCL, the description may be Parcel. | Yes |
- Click Save.
Terms of delivery
If there are specific delivery terms to which your business partners must adhere, complete the following procedure to define those terms now. After delivery terms are defined, you can assign them to business partners. You will perform that step later as part of the Business partner setup.
Delivery terms are also used on inbound order headers, arrival headers, outbound order headers and outbound order details, and shipping bill headers.
This is an informative field that can be used to print on external documents.
Add a delivery term
- On the menu, expand Basic Data > System > Transport, and then double-click Terms of Delivery.
- On the Terms of Delivery window, in the toolbar, click . The Add Terms of Delivery dialog box appears.

- Enter the following information.
| Field | Description | Required |
| Terms of Delivery Code | Unique system code that identifies a contractual delivery obligation between a seller and a buyer. | Yes |
| Terms of Delivery Desc | Simple statement that defines the delivery term. For example, if the terms of delivery code is DDP, the description may be Delivered duty paid. | Yes |
- Click Save.
Terms of payment
If there are specific payment terms to which your business partners must adhere, define those terms now. After payment terms are defined, you can assign them to business partners. You will perform that step later as part of the Business partner setup.
Payment terms are also used on inbound order headers, outbound order headers and shipping bill headers.
This is an informative field that can be used to print on external documents.
Add a payment term
- On the menu, expand Basic Data > System > Transport, and then double-click Terms of Payment.
- On the Terms of Payment window, in the toolbar, click . The Add Terms of Payment dialog box appears.
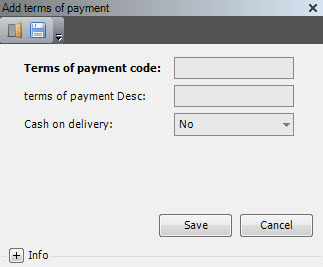
- Enter the following information.
| Field | Description | Required |
| Terms of Payment Code | Unique system code that identifies a payment rule that a supplier has imposed on a customer to ensure payment is received in a reasonable amount of time. | Yes |
| Terms of Payment Desc | Simple statement that defines the payment terms. For example, if the terms of payment code is EOM, then the description may be End of month. | Yes |
| Cash on Delivery | Value that indicates whether the terms of payment require cash payment upon delivery. The following values are supported:
|
No |
- Click Save.
Damage codes
Iptor WM1 uses damage codes to decide if a container, with usage type VH – Vehicle, can be loaded for outbound.
Add a damage code
- On the menu, expand Basic Data > System > Transport, and then double-click Damage.
- On the Damage Code window, in the toolbar, click . The Add Damage dialog box appears.
- Enter the following information.
| Field | Description | Required |
| Damage Code | Unique system code that identifies damage. |
Yes |
- On the General tab, enter the following information.
| Field | Description | Required |
| Damage Desc | Simple statement that defines the damage code. For example, if the damage code is LO, the description may be Light out. | Yes |
| Schema Owner | Refers to where the data record originates. Iptor WM1 comes standard with the schema owner dbo. To distinguish customer specific entries, a customer schema can be used. The value of the customer schema is defined in the database and configured within Iptor WM1. It corresponds to the schema used when accessing the SQL database. The following values are supported.
The standard naming convention for a customer specific value is a combined abbreviation of the customer name and install location. For example, CompanyABC installed in location CityXYZ could be comcit. |
Yes |
| Creation Date | Date and time of creation. Defaults to the current date and time. | Display only |
- Click Save.
