
Contents
Introduction
This guide explains how to configure functionality to help effectively manage the inventory in your warehouse.
Basic data
In this guide you will learn how to set up the following data.
- Reason (stock change) codes
- Reason code defaults
- Inventory statuses
- Counting groups (Inline counting)
- Counting templates (Offline counting)
- Counting template rules
- Counting template rule conditions
Reason (stock change) codes
A reason code, also known as a stock change code, is the mechanism in Iptor WM1 that is used to identify:
- Why a particular inventory management task is being performed.
- If extra actions should be triggered when executing an inventory transaction, such as:
- Handling the transaction as lost and found
- Splitting the transaction for mixed container
- Creating an extra container count transaction
- Determines whether the related inventory transaction is interfaced
The reason code is also used to limit:
- What adjustment type is performed
- What specific inventory changes are allowed
For each reason code, it is mandatory to define the user types that can apply it. You will perform that step later as part of User setup. This allows you to control what types of inventory transfers and changes can be executed by the users.
Add a reason code
- On the menu, expand Basic Data > System > Tracking and Tracing, and then double-click Reason Codes.
- On the Reason Code window, in the toolbar, click
 . The Add Reason Code dialog box appears.
- Enter the following information.
| Field | Description | Required |
| Stock Change Code | Unique system code that can be used to indicate the reason why an inventory transaction or task execution is done. It can be authorized by user type and determines what kind of inventory transaction or task execution is allowed. It is also used to define if the inventory transaction or task execution is interfaced. | Yes |
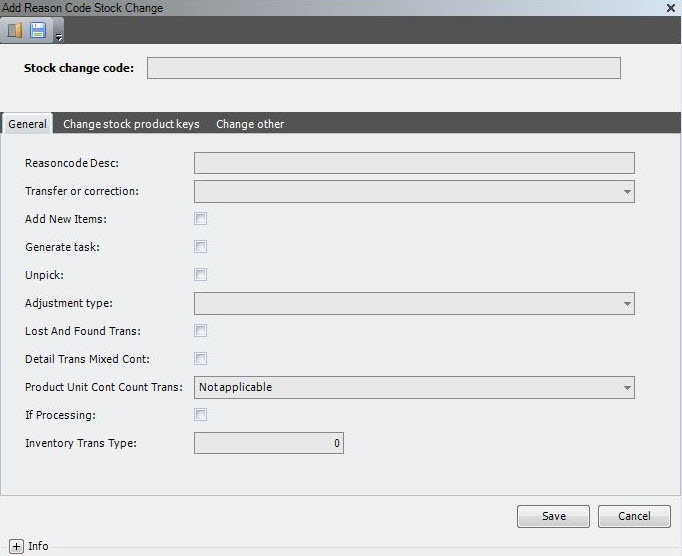
- On the General tab, enter the following information.
| Field | Description | Required | ||||||
| Reason Code Description | Simple statement that defines the reason code. For example, if the reason code is CRESTK, the description may be Create Stock. | Yes | ||||||
| Transfer or Correction |
Value that indicates the action associated with the tasks to which the reason code is applied.
A – Automatic Material Issue is currently not used. |
No | ||||||
| Add New Items | When selected, indicates that the reason code can be used when adding items to an existing container code. | No | ||||||
| Generate Task |
When selected, indicates that the reason code can be used when a task is generated. Applicable only for reason codes associated with T – Transfer tasks. |
No | ||||||
| Unpick | When selected, indicates that the reason code can be used when unpicking an order. | No | ||||||
| Adjustment Type | Value that indicates the inventory adjustment action associated with the reason code. The following values are supported.
|
Yes | ||||||
| Lost and Found Trans | When selected, indicates that when the inventory adjustment transaction is generated, the inventory is moved into a lost and found location.
|
No | ||||||
| Detail Trans Mixed Container | When selected, indicates that inventory detail transactions are logged when a mixed container is moved from one location to another. For non-mixed containers, the inventory details are always logged in the inventory transactions. | No | ||||||
| Product Unit Cont Count Trans | Value that indicates whether the transaction generates additional container count transactions based on information on stock product unit, and if yes, with what sign (same or opposite). The following values are supported.
|
No | ||||||
| If (Interface) Processing | When selected, indicates that information is sent in a transaction to the host system. This is an additional condition to the normal interface setup. | No | ||||||
| Inventory Trans Type |
When sending transactions to the host, this numeric value could be used to as a reference. For example, in the interface to Iptor DC1, this field can contain the transaction type number, known by the legacy system. |
No |
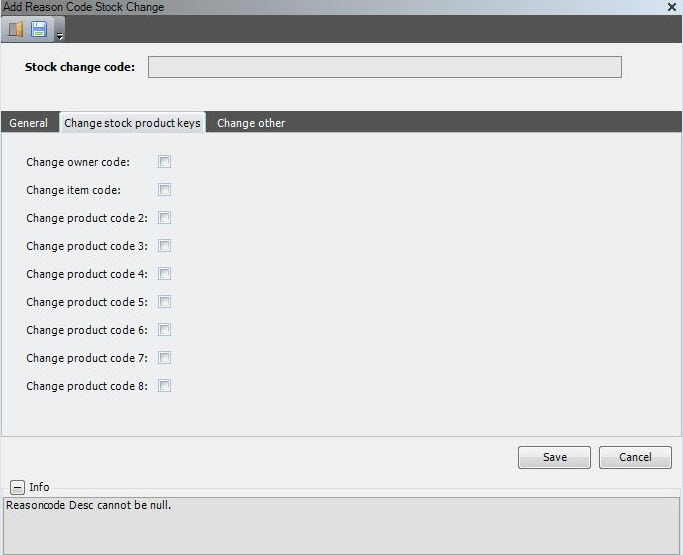
- Click the Change Stock Product Keys tab.
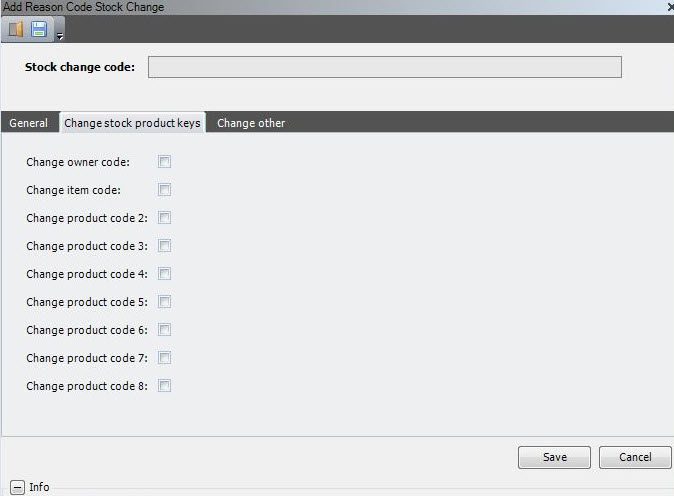
- Enter the following information.
| Field | Description | Required |
| Change Owner Code | When selected, indicates that the reason code can be used when the owner code is changed. | No |
| Change Item Code | When selected, indicates that the reason code can be used when the item code is changed. | No |
| Change Product Code 2–8 | When selected, indicates that the reason code can be used when the selected product code is changed. | No |
- Click the Change Other tab.
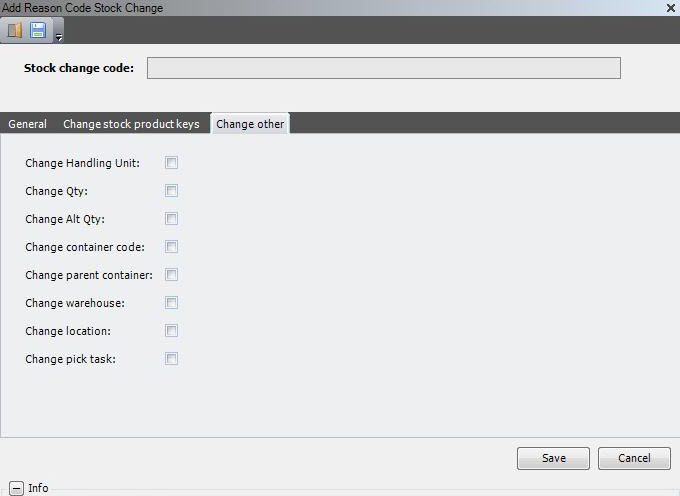
- Enter the following information.
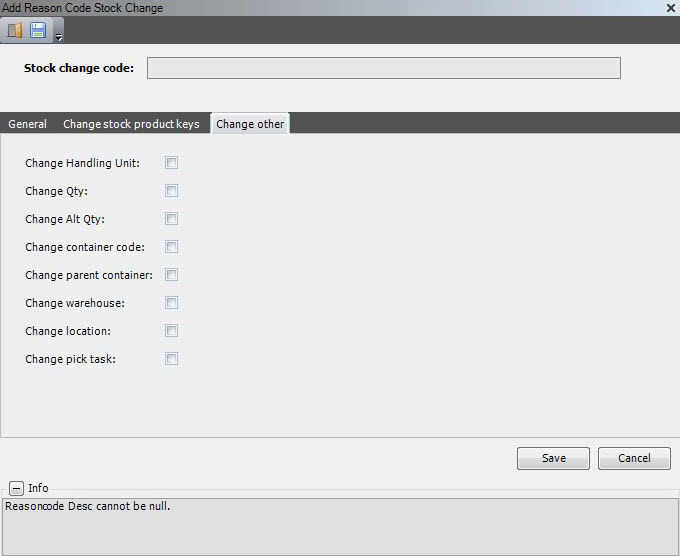
| Field | Description | Required |
| Change Handling Unit | When selected, indicates that the reason code can be used when the handling unit is changed. | No |
| Change Qty | When selected, indicates that the reason code can be used when the quantity is changed. | No |
| Change Alt Qty | When selected, indicates that the reason code can be used when the alternate quantity is changed. | No |
| Change Container Code | When selected, indicates that the reason code can be used when the container code is changed. | No |
| Change Parent Container | When selected, indicates that the reason code can be used when the parent container code is changed. | No |
| Change Warehouse | When selected, indicates that the reason code can be used when the warehouse is changed. | No |
| Change Location | When selected, indicates that the reason code can be used when the location code is changed. | No |
| Change Pick Task | When selected, indicates that the reason code can be used when a pick task is changed. | No |
- Click Save.
Reason code defaults
A reason code default is the combination of a reason code and an activity to which that reason code is applied. By assigning default reason codes to activities, you can:
- Eliminate the need for users to enter a reason code, when you know that a specific reason code is required.
- Ensure that an appropriate reason code is applied to a task, if one is not provided.
Add a reason code default
- On the menu, expand Basic Data > System > Tracing and Tracking and then double-click Reason Code Default.
- On the Reason Code Default window, in the toolbar, click . The Add Reason Code Default dialog box appears.
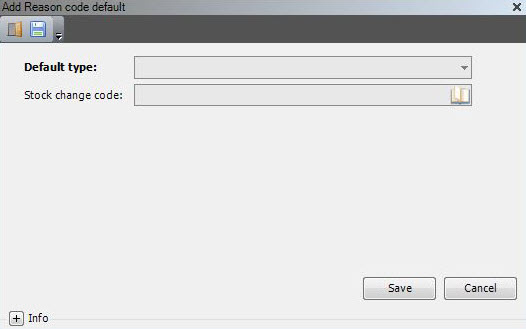
- Enter the following information.
| Field | Description | Required |
| Default Type | Standard Iptor WM1 warehouse function to which you want to associate a default reason code. The following values are supported.
|
Yes |
| Stock Change Code | Unique system code that can be used to indicate the reason why an inventory transaction or task execution is done. It can be authorized by user type and determines what kind of inventory transaction or task execution is allowed. It is also used to define if the inventory transaction or task execution is interfaced. In this usage, it is the reason code that is applied when a user performs the activity selected in the Default Type box, in those cases where the user does not provide a reason code at the time the activity is performed. | Yes |
- Click Save.
Inventory statuses
Every stock detail record can be assigned an inventory status. Inventory statuses are used to identify the physical condition, availability, or material handling requirements for the inventory.
Inventory can have more than one status. An inventory status can be given the attribute conform or blocked. The ability to add or remove statuses from inventory is managed by user permissions.
Add an inventory status
- On the menu, expand Basic Data > Advanced Functions > Inventory, and then double-click Inventory Status.
- On the Inventory Status window, in the toolbar, click . The Add Inventory Status dialog box appears.
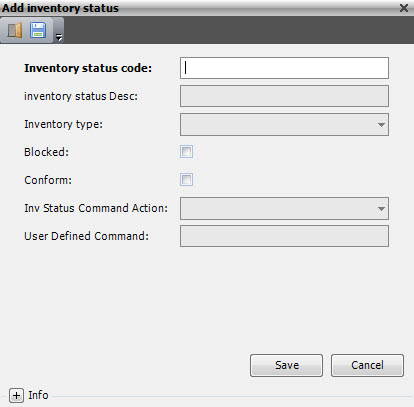
- Enter the following information.
| Field | Description | Required |
| Inventory Status Code | Unique system code that Iptor WM1 will use when referring to the status code. | Yes |
| Inventory Status Desc | Simple statement that describes the inventory status code. | Yes |
| Inventory Type | Value that indicates the nature of the status code. Informational only. The following values are supported.
|
Yes |
| Blocked | When selected, indicates that the inventory status code is blocked. When inventory has one or more blocked inventory status codes, the inventory will not be available for picking. | No |
| Conform | When selected, indicates that the inventory status code is conform. When inventory has one or more non-conform inventory status codes, the inventory will be considered as non-conform. | No |
| Inv Status Command Action | Value that specifies a predefined stored procedure that performs processing related to the inventory status registration. | No |
| User Defined Command | User defined stored procedure that performs processing related to the inventory status registration. | No |
- Click Save.
Inventory counting
Counting can be done inline as part of putaway, replenishment and picking warehouse processes, or offline as a separate process. Iptor WM1 supports both counting types.
- Inline counting is managed by counting groups. This function only applies if counting integration for the warehouse is activated. When an operator starts or finishes a putaway, replenishment or picking task, a count is executed in real-time to check if the physical stock level at the location corresponds with the quantity in the system. The inline counts are registered in the Counting log.
- Offline counting is managed by counting templates and is typically used for periodic checks of the inventory. It is executed by specific count tasks, which can be assigned to the regular warehouse operators or to a specific counting team. The offline counts are registered in Inventory Control Maintenance.
Counting groups (Inline counting)
Counting groups are created to allow you to carry out inline counts while performing another tasks, such as putaway, replenishment or picking. (This only applies to the task types: Pallet building (PALBL), Picking SKU (PICKC) and Replenishment SKU (REPLU).
A counting group can be assigned to locations and/or items / item pick location management (only used for pick locations). For putaway tasks and replenishment tasks, the ‘to location’ (destination) is considered. For picking tasks, the ‘from location’ (source) is considered.
In the counting group, you select the events that will trigger the creation of the count (for example, when the location becomes empty, after a specific number of hits, or after task deviation).
Add a counting group
- On the menu, expand Basic Data > Advanced Functions > Inventory, and then double-click Counting Group.
- On the Counting Group window, in the toolbar, click . The Add Counting Group dialog box appears.
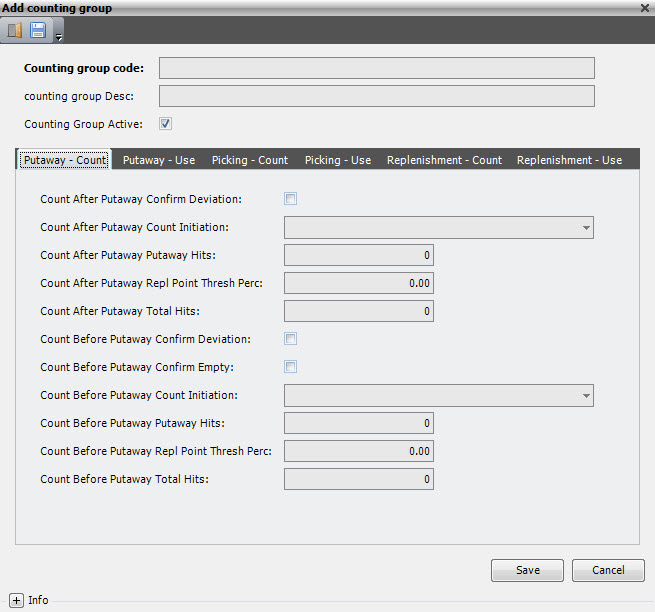
- Enter the following information.
| Field | Description | Required |
| Counting Group Code | Unique system code that identifies a counting group. The counting group is used for inline counting and can be defined on item, item pick location management or on location. | Yes |
| Counting Group Desc | Simple statement that describes the counting group. | Yes |
| Counting Group Active | When selected, indicates that the counting group is usable. | Yes |
- On the Putaway – Count tab, enter the following information.
| Field | Description | Required |
| Count After Putaway Confirm Deviation | When selected, indicates that if the counted quantity (that is triggered after putaway) does not agree with the theoretical quantity, it is possible that a recount is requested (where the quantity must be re-entered). This process continues until the user has entered the same value twice consecutively. | No |
| Count After Putaway Count Initiation | Inline counting is only triggered after a putaway if this value is, ‘Interactive’. | Yes |
| Count After Putaway Putaway Hits | Value that indicates that inline counting is triggered after a putaway every n putaway tasks. The number of hits can be found in the (internal) counting statistics table. | No |
| Count After Putaway Repl Point Thresh Perc | Threshold percentage that the system will use as following: Inline counting is triggered after putaway if the quantity of the container is below the threshold percentage of the replenishment point (found in the product pick location or the item pick location management). This inline counting is only triggered if at least one (sku or pallet) replenishment hit can be found in the (internal) counting statistics table (to avoid recounting over and over again). |
No |
| Count After Putaway Total Hits | Value that indicates that inline counting is triggered after a putaway if the total number of tasks (sku picking, sku replenishment, putaway, pallet picking, pallet replenishment, pallet putaway) becomes bigger than the value in this field. The number of tasks (hits) can be found in the (internal) counting statistics table. | No |
| Count Before Putaway Confirm Deviation | When selected, indicates that if a counted quantity that is triggered before putaway does not agree with the theoretical quantity, it is possible that a recount is asked (where the quantity must be re-entered). This process continues until the user has entered the same value twice consecutively. | No |
| Count Before Putaway Confirm Empty | When selected, indicates that inline counting is triggered after a putaway if the ‘to container’ has no stock detail. The system looks at the putaway use flags (other tab in this window) to evaluate the stock detail to a level of owner, item, product code 2–8, handling unit. | No |
| Count Before Putaway Count Initiation | Inline counting is only triggered before a putaway if this value is, ‘Interactive’. | Yes |
| Count Before Putaway Putaway Hits | Value that indicates that inline counting is triggered before a putaway every n putaway tasks. The number of hits can be found in the (internal) counting statistics table. | No |
| Count Before Putaway Repl Point Thresh Perc | Threshold percentage that the system will use as following: Inline counting is triggered before putaway if the quantity of the container is below the threshold percentage of the replenishment point (found in the product pick location or the item pick location management). This inline counting is only triggered if at least one (sku or pallet) replenishment hit can be found in the (internal) counting statistics table. (to avoid recounting over and over again). |
No |
| Count Before Putaway Total Hits | Value that indicates that inline counting is triggered before a putaway if the total number of tasks (sku picking, sku replenishment, putaway, pallet picking, pallet replenishment, pallet putaway) becomes bigger than the value in this field. The number of tasks (hits) can be found in the (internal) counting statistics table. | No |
- Click the Putaway – Use tab.
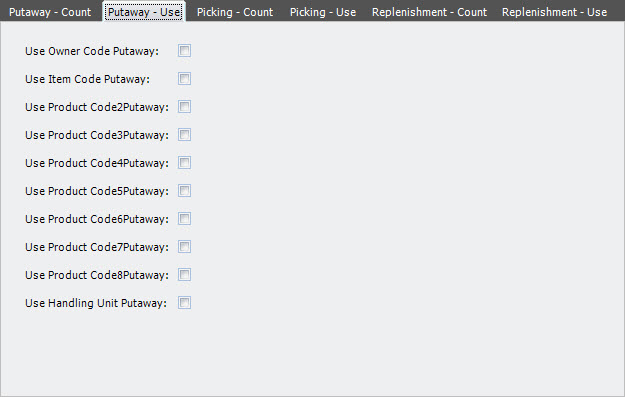
- Enter the following information.
| Field | Description | Required |
| Use Owner Code Putaway | When selected, indicates that the owner code is taken into account to find: – internal counting statistics to determine the number of hits or the total hits – the stock detail to evaluate ‘confirm empty’ |
No |
| Use Item Code Putaway | When selected, indicates that the item code is taken into account to find: – internal counting statistics to determine the number of hits or the total hits – the stock detail to evaluate ‘confirm empty’ |
No |
| Use Product Code 2–8 Putaway | When selected, indicates that product codes 2–8 are taken into account to find: – internal counting statistics to determine the number of hits or the total hits – the stock detail to evaluate ‘confirm empty’ |
No |
| Use Handling Unit Putaway | When selected, indicates that the handling unit code is taken into account to find: – internal counting statistics to determine the number of hits or the total hits – the stock detail to evaluate ‘confirm empty’ |
No |
- Click the Picking – Count tab.
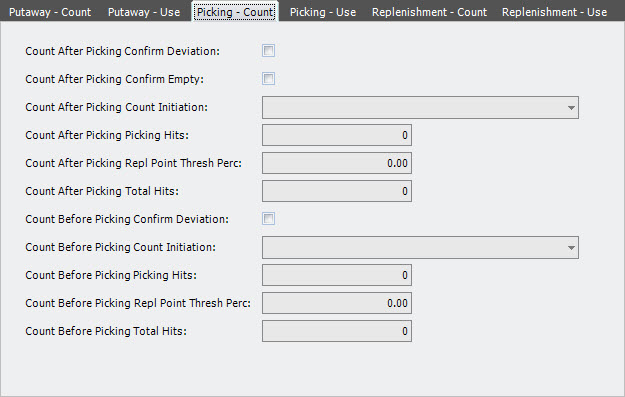
- Enter the following information.
| Field | Description | Required |
| Count After Picking Confirm Deviation | When selected, indicates that if the counted quantity (that is triggered after sku picking) does not agree with the theoretical quantity, it is possible that a recount is requested (where the quantity must be re-entered). This process continues until the user has entered the same value twice consecutively. | No |
| Count After Picking Confirm Empty | When selected, indicates that inline counting is triggered after a sku picking if the ‘from container’ has no stock detail. The system looks at the picking use flags (other tab in this window) to evaluate the stock detail to a level of owner, item, product code 2–8, handling unit. | No |
| Count After Picking Count Initiation | Inline counting is only triggered after a sku picking if this value is, ‘Interactive’. | Yes |
| Count After Picking Picking Hits | Value that indicates that inline counting is triggered after a sku pick every n sku pick tasks. The number of hits can be found in the (internal) counting statistics table. | No |
| Count After Picking Repl Point Thresh Perc | Threshold percentage that the system will use as following: Inline counting is triggered after sku picking if the quantity of the container is below the threshold percentage of the replenishment point (found in the product pick location or the item pick location management). This inline counting is only triggered if at least one (sku or pallet) replenishment hit can be found in the (internal) counting statistics table (to avoid recounting over and over again). |
No |
| Count After Picking Total Hits | Value that indicates that inline counting is triggered after a sku picking if the total number of tasks (sku picking, sku replenishment, putaway, pallet picking, pallet replenishment, pallet putaway) becomes bigger than the value in this field. The number of tasks (hits) can be found in the (internal) counting statistics table. | No |
| Count Before Picking Confirm Deviation | When selected, indicates that if the counted quantity that is triggered before a sku picking does not agree with the theoretical quantity, it is possible that a recount is requested (where the quantity must be re-entered). This process continues until the user enter the same value twice consecutively. | No |
| Count Before Picking Count Initiation | Inline counting is only triggered before a sku picking if this value is, ‘Interactive’. | Yes |
| Count Before Picking Picking Hits | Value that indicates that inline counting is triggered before a sku pick every n sku pick tasks. The number of hits can be found in the (internal) counting statistics table. | No |
| Count Before Picking Repl Point Thresh Perc | Threshold percentage that the system will use as following: Inline counting is triggered before sku picking if the quantity of the container is below the threshold percentage of the replenishment point (found in the product pick location or the item pick location management). This inline counting is only triggered if at least one (sku or pallet) replenishment hit can be found in the (internal) counting statistics table (to avoid recounting over and over again). |
No |
| Count Before Picking Total Hits | Value that indicates that inline counting is triggered after a sku picking if the total number of tasks (sku picking, sku replenishment, putaway, pallet picking, pallet replenishment, pallet putaway) becomes bigger than the value in this field. The number of tasks (hits) can be found in the (internal) counting statistics table. | No |
- Click the Picking – Use tab.
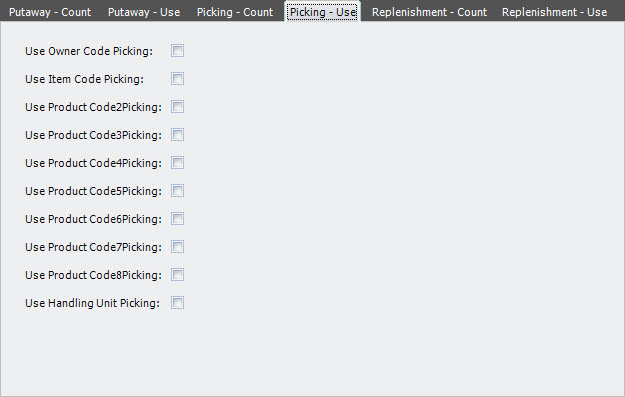
- Enter the following information.
| Field | Description | Required |
| Use Owner Code Picking | When selected, indicates that the owner code is taken into account to find: – internal counting statistics to determine the number of hits or the total hits – the stock detail to evaluate ‘confirm empty’ |
No |
| Use Item Code Picking | When selected, indicates that the item code is taken into account to find: – internal counting statistics to determine the number of hits or the total hits – the stock detail to evaluate ‘confirm empty’ |
No |
| Use Product Code 2–8 Picking | When selected, indicates that product codes 2–8 are taken into account to find: – internal counting statistics to determine the number of hits or the total hits – the stock detail to evaluate ‘confirm empty’ |
No |
| Use Handling Unit Picking | When selected, indicates that the handling unit code is taken into account to find: – internal counting statistics to determine the number of hits or the total hits – the stock detail to evaluate ‘confirm empty’ |
No |
- Click the Replenishment – Count tab.
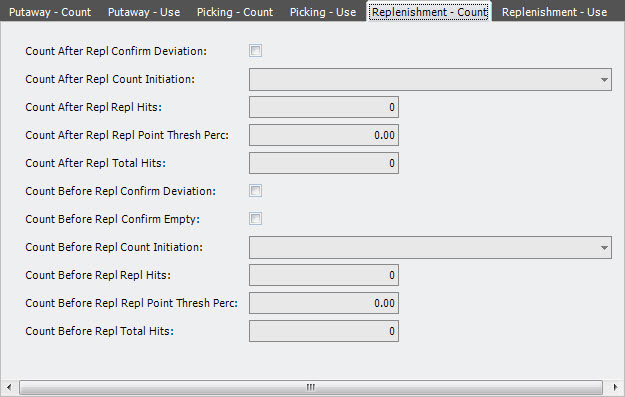
- Enter the following information.
| Field | Description | Required |
| Count After Repl Confirm Deviation | When selected, indicates that if the counted quantity (that is triggered after sku replenishment) does not agree with the theoretical quantity, a recount can be requested (where the quantity must be re-entered). This process continues until the user enters the same value twice consecutively. | No |
| Count After Repl Count Initiation | Inline counting is only triggered after a sku replenishment if this value is, ‘Interactive’. | Yes |
| Count After Repl Repl Hits | Value that indicates that inline counting is triggered after a sku replenishment every n sku replenishment tasks. The number of hits can be found in the (internal) counting statistics table. | No |
| Count After Repl Repl Point Thresh Perc | Threshold percentage that the system will use as following: Inline counting is triggered after sku replenishment if the quantity of the container is below the threshold percentage of the replenishment point (found in the product pick location or the item pick location management). This inline counting is only triggered if at least one (sku or pallet) replenishment hit can be found in the (internal) counting statistics table (to avoid recounting over and over again). |
No |
| Count After Repl Total Hits | Value that indicates that inline counting is triggered after a sku replenishment if the total number of tasks (sku picking, sku replenishment, putaway, pallet picking, pallet replenishment, pallet putaway) becomes bigger than the value in this field. The number of tasks (hits) can be found in the (internal) counting statistics table. | No |
| Count Before Repl Confirm Deviation | When selected, indicates that if the counted quantity is triggered before sku replenishment does not agree with the theoretical quantity, a recount can be requested (where the quantity must be re-entered). This process continues until the user enters the same value twice consecutively. | No |
| Count Before Repl Confirm Empty | When selected, indicates that inline counting is triggered after a sku replenishment if the ‘to container’ has no stock detail. The system looks at the replenishment use flags (other tab in this window) to evaluate the stock detail to a level of owner, item, product code 2–8, handling unit. | No |
| Count Before Repl Count Initiation | Inline counting is only triggered before a sku replenishment if this value is, ‘Interactive’. | No |
| Count Before Repl Repl Hits | Value that indicates that inline counting is triggered before a sku replenishment every n sku replenishment tasks. The number of hits can be found in the (internal) counting statistics table. | No |
| Count Before Repl Repl Point Thresh Perc | Threshold percentage that the system will use as following: Inline counting is triggered before sku replenishment if the quantity of the container is below the threshold percentage of the replenishment point (found in the product pick location or the item pick location management). This inline counting is only triggered if at least one (sku or pallet) replenishment hit can be found in the (internal) counting statistics table (to avoid recounting over and over again). |
No |
| Count Before Repl Total Hits | Value that indicates that inline counting is triggered before a sku replenishment if the total number of tasks (sku picking, sku replenishment, putaway, pallet picking, pallet replenishment, pallet putaway) becomes bigger than the value in this field. The number of tasks (hits) can be found in the (internal) counting statistics table. | No |
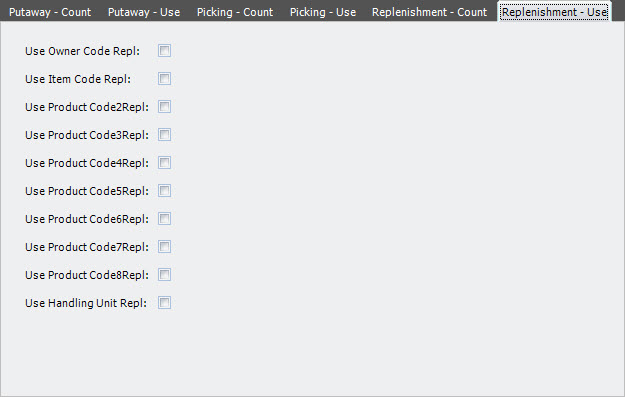
- Click the Replenishment – Use tab.
- Enter the following information.
| Field | Description | Required |
| Use Owner Code Repl | When selected, indicates that the owner code is taken into account to find: – internal counting statistics to determine the number of hits or the total hits – the stock detail to evaluate ‘confirm empty’ |
No |
| Use Item Code Repl | When selected, indicates that the item code is taken into account to find: – internal counting statistics to determine the number of hits or the total hits – the stock detail to evaluate ‘confirm empty’ |
No |
| Use Product Code 2–8 Repl | When selected, indicates that product code 2–8 are taken into account to find: – internal counting statistics to determine the number of hits or the total hits – the stock detail to evaluate ‘confirm empty’ |
No |
| Use Handling Unit Repl | When selected, indicates that the handling unit code is taken into account to find: – internal counting statistics to determine the number of hits or the total hits – the stock detail to evaluate ‘confirm empty’ |
No |
- Click Save.
Counting templates (Offline counting)
A counting template contains the parameters that determine how and when offline counting tasks are generated. A counting template generates one or more ‘Inventory Control Container Check’ batches. When a batch is approved, a list of inventory count records is created based on the template rules and conditions. If an unfinished count record for a certain location or item exists in another batch, the system will not create a new record in the current batch.
Counting can be paper-based or RF-based. When all count tasks of an inventory control batch are finished (or cancelled), the counting supervisor decides which records need a recount and then closes that inventory control container check batch. Then, the recounts are generated in a new inventory control batch and the non-recounted records will update the stock if the count had a deviating result and the template allows it.
Add a counting template
- On the menu, expand Basic Data > Advanced Functions > Inventory, and then double-click Counting Template.
- On the Counting Template window, in the toolbar, click . The Add Counting Template dialog box appears.
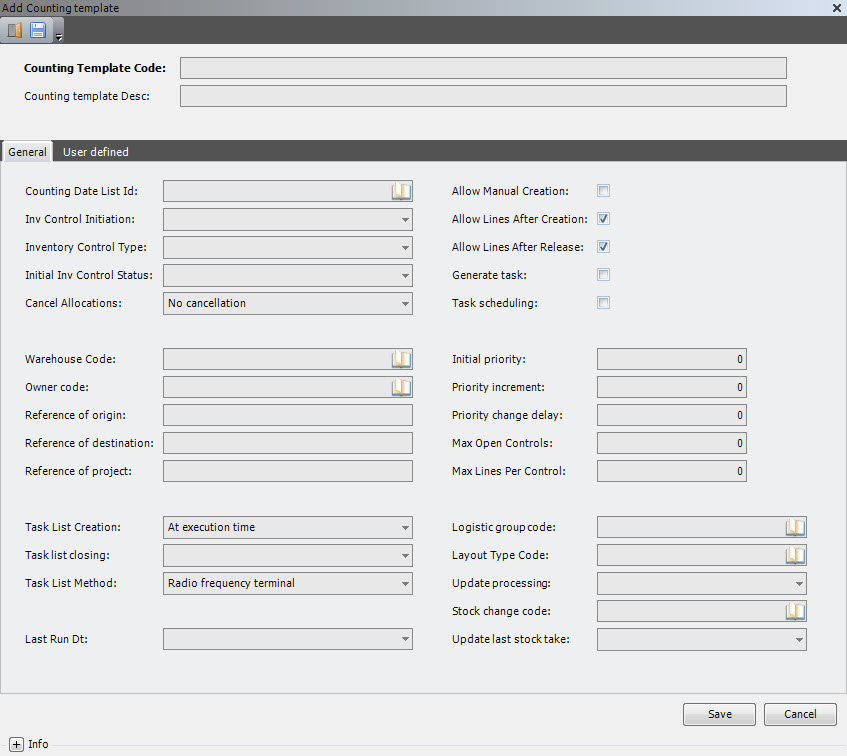
- Enter the following information.
| Field | Description | Required |
| Counting Template Code | Unique system code that identifies a counting template. A counting template contains the parameters that determine how and when offline counting tasks are generated. | Yes |
| Counting Template Description | Simple statement that describes the counting template. | Yes |
- On the General tab, enter the following information.
| Field | Description | Required | ||||||||
| Counting Date List ID | Value that indicates the date list (calendar) that can be used for a (custom) handler job to automatically generate an off line counting batch. It is mandatory if the inventory control initiation is time based (TIM). | No | ||||||||
| Inventory Control Initiation | Value that indicates how and when inventory controls for this counting template should be initiated. The following values are supported.
|
No | ||||||||
| Inventory Control Type |
Value that indicates the type of inventory control to create.
|
Yes | ||||||||
| Initial Inventory Control Status |
Status that an inventory control based on this template will get. It determines the steps to be performed when creating an inventory control.
|
Yes | ||||||||
| Warehouse Code | Unique system code that identifies a warehouse. In this setting, it is used to create an inventory control related to this counting template. | No | ||||||||
| Owner Code | Unique system code that identifies an owner. In this setting, it used to create an inventory control related to this counting template. | No | ||||||||
| Reference of Origin | Default value for the inventory control creation. | No | ||||||||
| Reference of Destination | Default value for the inventory control creation. | No | ||||||||
| Reference of Project | Default value for the inventory control creation. | No | ||||||||
| Initial Priority | Default for counting tasks created by the template. | No | ||||||||
| Priority Increment | Default for counting tasks created by the template. | No | ||||||||
| Priority Change Delay | Default for counting tasks created by the template. | No | ||||||||
| Maximum Open Controls | Maximum number of inventory controls that may be opened simultaneously for the specified counting template. The system uses this when creating a new inventory control header during the create function of the inventory control header. | No | ||||||||
| Maximum Lines Per Control | Maximum number of lines that may be contained in an inventory control for the specified template. The system uses this when creating inventory control check records during the approve of the inventory control header. | No | ||||||||
| Allow Manual Creation | When selected, indicates that manual creation of inventory controls is allowed with the counting template code. | No | ||||||||
| Allow Lines After Creation | When selected, indicates that it is possible to add counting lines to an inventory control that is created for the counting template. | No | ||||||||
| Allow Lines After Release | When selected, indicates that is possible to add counting lines to a released inventory control that is created for the counting template. | No | ||||||||
| Generate Task | When selected, indicates that counting can be performed using tasks or without using tasks. | No | ||||||||
| Task Scheduling | When selected, indicates that task scheduling may be done immediately. If it is allowed, it depends on the time default and the transport procedure equipment if scheduling happens. | No | ||||||||
| Task List Creation | Value that defines when task lists must be created for a picklist. The following values are supported.
|
No | ||||||||
| Task List Closing | Used as a default when an inventory control is created. | Yes | ||||||||
| Task List Method |
Value that specifies how task details are executed. The following values are supported.
|
No | ||||||||
| Logistic Group Code | Unique system code that is used to associate a value added service with this counting template. | No | ||||||||
| Layout Type Code | Unique system code that identifies a layout type. The layout type can be used to assign specific layouts of printing documents that are defined in the printing type. The layout type can be controlled via business partner address, transport company, wave template, picklist template, outbound template, replenishment template and yard template. It can also be used from the counting template. | No | ||||||||
| Update Processing | Value that is used to create an inventory control related to this counting template. | Yes | ||||||||
| Stock Change Code |
Value that is used to create an inventory control related to this counting template |
No | ||||||||
| Update Last Stock Take | Value that is used to create an inventory control related to this counting template. The following values are supported.
|
Yes | ||||||||
| Last Run Datetime | Value that is updated by the system when a inventory control batch is created based on this counting template. | No |
- Click the User Defined tab.
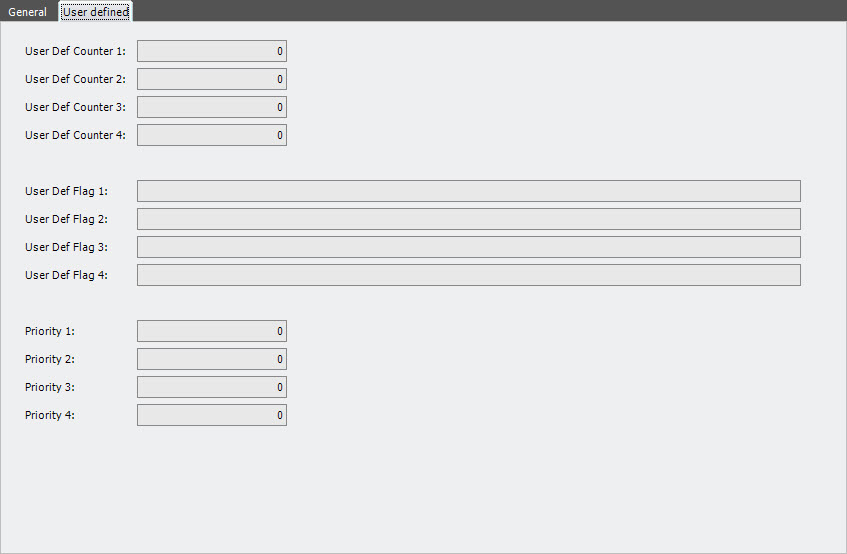
- Enter the following information.
| Field | Description | Required |
| User Def Counter 1–4 | Reserved for customer-specific application. | No |
| User Def Flag 1–4 | Reserved for customer-specific application. | No |
| Priority 1–4 | Reserved for customer-specific application. | No |
- Click Save.
Counting template rules
Several rules determine the item and location to include in a counting proposal. The counting template is applicable for all records satisfying the conditions of the rule.
Add a counting template rule
- On the menu, expand Basic Data > Advanced Functions > Inventory, and then double-click Counting Template.
- On the Counting Template window, right-click the counting template to which you want to add a rule, and then click Counting Template Rule.
- In the Counting Template Rule grid view toolbar, click . The Add Counting Template Rule dialog box appears.
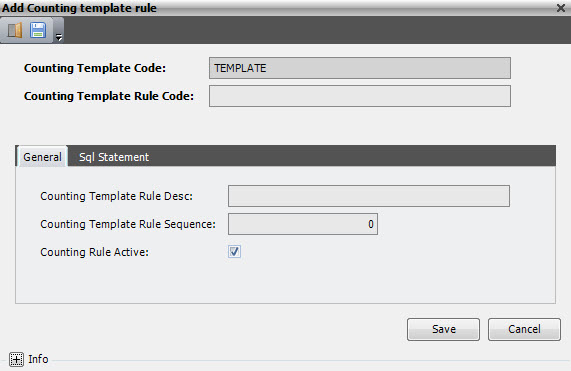
- Enter the following information.
| Field | Description | Required |
| Counting Template Code | Unique system code that identifies a counting template. A counting template contains the parameters that determine how and when offline counting tasks are generated. | Yes |
| Counting Template Rule Code | Unique system code that identifies a counting template rule. Several rules determine the item and location to include in a counting proposal. | Yes |
- On the General tab, enter the following information.
| Field | Description | Required |
| Counting Template Rule Desc | Simple statement that describes the counting template rule. | Yes |
| Counting Template Rule Sequence | Value that defines the sequence for the counting template rule. | Yes |
| Counting Rule Active | When selected, indicates that the counting rule is usable. | Yes |
- If desired, click the SQL Statement tab to view the SQL statement that is generated by the system every time a condition is added, updated or deleted.
- Click Save.
Counting template rule conditions
For a counting template rule, you can specify conditions that must be satisfied for the rule to be applicable. This controls what is counted for the rule. For example, you want to be able to count only a portion of your warehouse at a specific point in time. You would separate your warehouse into zones and then create the condition to stipulate the warehouse zone for which the rule was created. You would then create separate rules and conditions for all of your warehouse zones.
Add a counting template rule condition
- On the menu, expand Basic Data > Advanced Functions > Inventory, and then double-click Counting Template.
- On the Counting Template window, right-click the counting template to which you want to add a rule, and then click Counting Template Rule.
- On the Counting Template Rule grid view, right-click the counting template rule to which you want to add a condition, and then click Counting Template Rule Condition.
- In the Counting Template Rule Condition grid view toolbar, click . The Add Counting Template Rule Condition dialog box appears.
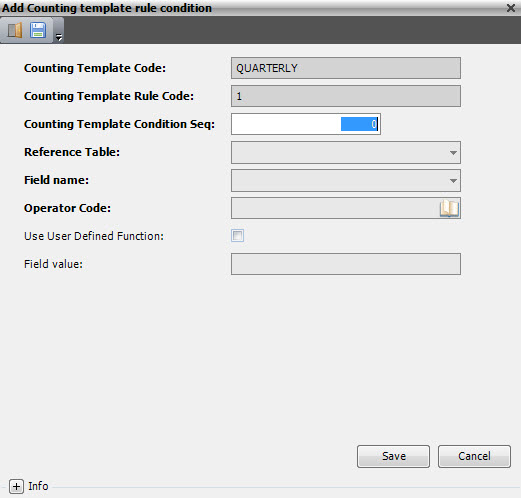
- Enter the following information.
| Field | Description | Required | ||||||||||||||||||||||||||||||||||||||||||||||||||||||||||||||||||||||||||||||||
| Counting Template Code | Unique system code that identifies a counting template. A counting template contains the parameters that determine how and when offline counting tasks are generated. | Display only | ||||||||||||||||||||||||||||||||||||||||||||||||||||||||||||||||||||||||||||||||
| Counting Template Rule Code | Unique system code that identifies a counting template rule. Several rules determine the item and location to include in a counting proposal. | Display only | ||||||||||||||||||||||||||||||||||||||||||||||||||||||||||||||||||||||||||||||||
| Counting Template Condition Seq | Value that defines the sequence for the counting template condition. | Yes | ||||||||||||||||||||||||||||||||||||||||||||||||||||||||||||||||||||||||||||||||
| Reference Table | Table from which a field is selected in this condition. | Yes | ||||||||||||||||||||||||||||||||||||||||||||||||||||||||||||||||||||||||||||||||
| Field Name | Name of the field that is used in this condition. | Yes | ||||||||||||||||||||||||||||||||||||||||||||||||||||||||||||||||||||||||||||||||
| Operator Code |
|
Yes | ||||||||||||||||||||||||||||||||||||||||||||||||||||||||||||||||||||||||||||||||
| Use User Defined Function | When selected, indicates that the Field Value contains a ’user defined function’ like an SQL function or a reference to a field in another table.
|
No | ||||||||||||||||||||||||||||||||||||||||||||||||||||||||||||||||||||||||||||||||
| Field Value | Value that is used by the operator. You can enter a constant value like 0 or ABC or 2016-12-31 00:00:00.000. Do not put the entered value between quotes and put Use user defined function to 0. You can also enter a ’user defined function’ like an SQL function (for example, getdate()) or a reference to a field in another table (for example, item qty_per_container_expected), but then put Use user defined function to 1. |
No |
- Click Save.
