
Contents
Introduction
This guide explains how to identify and provide specific details about the equipment used in your facility.
Basic data
In this guide you will learn how to set up the following data.
- Equipment groups
- Equipment
- Equipment and equipment zone relationships
- Transport procedures
- Transport procedure trajectories
- Transport procedure equipment
- Transport procedure routes
- Time defaults
- Equipment combinations
Equipment groups
Equipment groups consist of equipment that have the same physical features, transport procedure and default task mode. An equipment group should be set up for each type of equipment you use in your facility. For example, you may have a group for narrow aisle trucks, reach trucks, counter balance trucks, pick trucks, trolleys, etc. This allows you to set default properties to all pieces of equipment within a group.
For example, a Count Equipment Group Code is set up for the counting functionality in Iptor WM1, and the default mode to use is COUNT. When requesting tasks on equipment that belong to this equipment group code, by default it gets tasks for Task Mode Type, COUNT.
Add an equipment group
- On the menu, expand Basic Data > Equipments, and then double-click Equipment Group.
- On the Equipment Group window, in the toolbar, click
 . The Add Equipment Group dialog box appears.
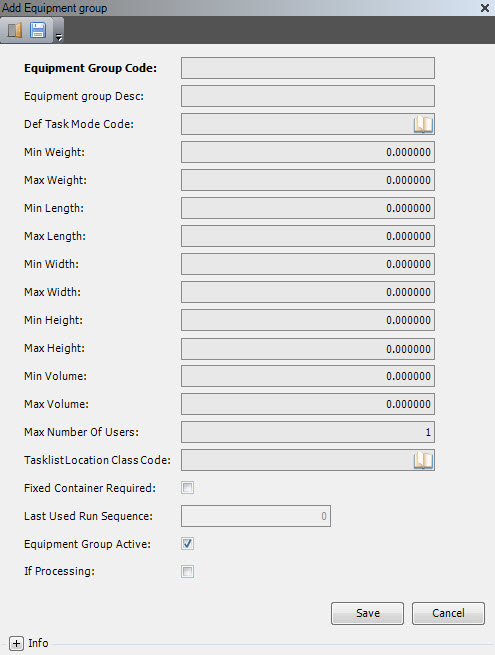
- Enter the following information.
| Field | Description | Required |
| Equipment Group Code | Unique system code that identifies an equipment group. | Yes |
| Equipment Group Desc | Simple statement that defines the equipment group. For example, if the location group code is TRUCK, the description may be Yard truck. | Yes |
| Def Task Mode Code | Unique system code that identifies a task mode. In this usage, it is the default task mode to use when working with equipment of the specified group, and another value is not specified. | Yes |
| Min Weight | Minimum container weight that can be handled by the specified equipment. This is not used by the system for calculations. | No |
| Max Weight | Maximum container weight that can be handled by the specified equipment. This is not used by the system for calculations. | No |
| Min Length | Minimum container weight that can be handled by the specified equipment. This is not used by the system for calculations. | No |
| Max Length | Maximum container weight that can be handled by the specified equipment. This is not used by the system for calculations. | No |
| Min Width | Minimum container width that can be handled by the specified equipment. This is not used by the system for calculations. | No |
| Max Width | Maximum container width that can be handled by the specified equipment. This is not used by the system for calculations. | No |
| Min Height | Minimum container height that can be handled by the specified equipment. This is not used by the system for calculations. | No |
| Max Height | Maximum container height that can be handled by the specified equipment. This is not used by the system for calculations. | No |
| Min Volume | Minimum container volume that can be handled by the specified equipment. This is not used by the system for calculations. | No |
| Max Volume | Maximum container volume that can be handled by the specified equipment. This is not used by the system for calculations. | No |
| Max Number of Users | Maximum number of users allowed to work concurrently with equipment of this group. | Yes |
| Tasklist Location Class Code | Unique system code that identifies a location class. In this usage, it is the location class to which to restrict the products that may be stored on equipment for receiving or putaway. This is only the case for equipment that belongs to an equipment group for which a tasklist location class code is specified. The location class to use for the equipment is determined as the receiving location class of the product location group of the stock products concerned. | No |
| Fixed Container Required | When selected, indicates that a fixed container must be linked to equipment (in table equipment) before it can be used for task execution. | No |
| Last Used Run Sequence | Value that is updated by the system during package calculation (for the algorithm, Predefined equipment). | No |
| Equipment Group Active | When selected, indicates that the equipment group is available for use. | Yes |
| If (Interface) Processing | When selected, indicates that the information is sent in a transaction to the host system. This is an additional condition to the normal interface setup. | No |
- Click Save.
Equipment
Equipment consists of the devices used to execute tasks to transfer items or goods (for example, from receiving to an identified storage location, from an identified location to shipment area, or from one location to another location inside the warehouse). This applies to container moves as well as inventory moves.
Prerequisites
Prior to setting up equipment, you must have this basic data defined:
- Task modes
- Equipment zones
- Equipment locations
If you have not done so, perform the setup tasks for required data first. Then, return to complete this procedure.
Add equipment
- On the menu, expand Basic Data > Equipments, and then double-click Equipment.
- On the Equipment window, in the toolbar, click . The Add Equipment dialog box appears.
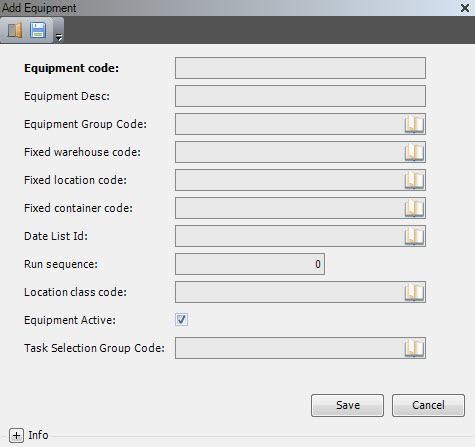
- Enter the following information.
| Field | Description | Required | ||
| Equipment Code | Unique system code that identifies a piece of equipment. | Yes | ||
| Equipment Desc | Simple statement that defines the equipment. For example, if the equipment code is LG01, the description may be Load for Gate 01. | Yes | ||
| Equipment Group Code | Each equipment detail refers to an equipment code. It must be valid in the equipment group table. In practice, all equipment details that belong to certain equipment can perform tasks that are foreseen for that equipment. | Yes | ||
| Fixed Warehouse Code | Unique system code that identifies a warehouse. In this usage, if a location is linked to the equipment (for example, a trolley), then it is the warehouse of that location. | No | ||
| Fixed Location Code |
When a location is linked to an equipment (for example, a trolley), the location must be mentioned. At SKU picking, the picking containers are put on this location and afterwards (when all SKU picking tasks are confirmed) a stage/move task (to the Pick dock or consolidation location) can be proposed for all finished containers on this location. By default, a location should be attributed to only one equipment. If simultaneous picking of one same container is required, a shared Fixed location must be set up.
|
Yes | ||
| Fixed Container Code | If this is filled in, its container usage must be EQ – Equipment. | No | ||
| Date List ID | Value that defines the time-intervals that the equipment can be active. Informational only. Must be a valid value in the date list table. | No | ||
| Run Sequence | If filled in (not zero), this must be unique within an equipment group. | No | ||
| Location Class Code | When a task list is released for equipment of a group with a task list location class code filled in, this is updated on the location class code of the equipment. This implies that, for such equipment, it is not possible to add additional inventory once a task list is released. | No | ||
| Equipment Active | When selected, indicates that the equipment is available for use. | Yes | ||
| Task Selection Group Code | Unique system code that identifies a task selection group. The task selection group is used in combination with task selection rules to filter a subset of tasks for processing. | No |
- Click Save.
Equipment and equipment zone relationships
An equipment zone is a logical grouping of locations within which one or more pieces of equipment and one or more users are allowed to move containers or a quantity of stock products.
After equipment is created, you must define the zones that the equipment is authorized to enter. You can:
- Restrict equipment access to a specific equipment zone. (Work will only be assigned to a user who is using equipment defined for that zone.)
- Allow equipment access to all equipment zones.
If equipment should have access to most equipment zones, you can allow access to all, and delete those that do not apply.
Prerequisites
To complete this procedure, you must have set up the following data.
- Warehouses
- Equipment zones
- Equipment
If you have not done so, perform the setup tasks for required data first. Then, return to complete this procedure.
Restrict equipment access to a specific equipment zone
- On the menu, expand Basic Data > Equipments, and then double-click Equipment.
- On the Equipment window, right-click the equipment for which you want to zone information, and then click Equipment and Zone.
- In the Equipment and Zone grid view toolbar, click . The Add Equipment and Zone dialog box appears.
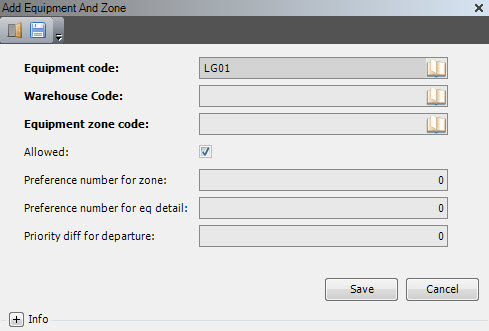
- Enter the following information.
| Field | Description | Required |
| Equipment Code | Unique system code that identifies a piece of equipment. | Display only |
| Warehouse Code | Unique system code that identifies a warehouse. | Yes |
| Equipment Zone Code | Unique system code that identifies an equipment zone. | Yes |
| Allowed | When selected, indicates that the specified equipment is allowed in the specified equipment zone. | Yes |
| Preference Number for Zone | Priority number assigned to the zone. | No |
| Preference Number for Eq Detail | Priority number assigned to the equipment. | No |
| Priority Diff for Departure | Number that defines how much higher in priority a task in a different work zone must be for the equipment to be assigned to the work. | No |
Allow equipment access in all equipment zones
- On the menu, expand Basic Data > Equipments, and then double-click Equipment.
- On the Equipment window, right-click the equipment for which you want to allow all zones, and then click Equipment and Zone Allow All.
- In the Equipment and Zone Allow All grid view toolbar, click . The Add Equipment and Zone Allow All dialog box appears.
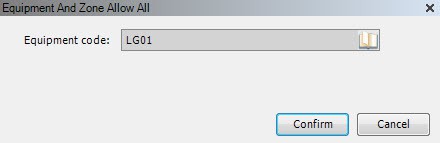
- In the Equipment Code box, verify that the code is for the equipment that you want to allow in all zones, and then click Confirm.

Transport procedures
Transport procedures are used to manage internal transports (via task execution). They are the basis for defining subsequent transport steps (task decomposition) in an internal route and the equipment associated to them.
Add a transport procedure
- On the menu, expand Basic Data > Equipments, and then double-click Transport Procedure.
- On the Transport Procedure window, in the toolbar, click . The Add Transport Procedure dialog box appears.
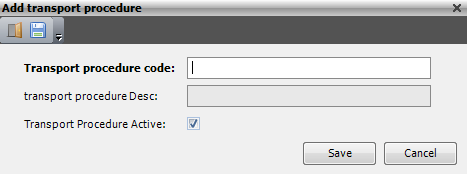
- Enter the following information.
Field Description Required Transport Procedure Code Unique system code that identifies the transport procedure. Yes Transport Procedure Desc Simple statement that describes the transport procedure. Yes Transport Procedure Active When selected, indicates that the transport procedure is available for use. Yes - Click Save.
Transport procedure trajectories
Transport procedure trajectory are used in task creation and task decomposition.
Within the transport procedure trajectory, the equipment groups to go from one to another (or the same) transport area are defined. The transport procedure trajectory can also be used to bundle route definitions, which define the possible intermediate transport area to use when going from one transport area to another.
Add a transport procedure trajectory
- On the menu, expand Basic Data > Equipments, and then double-click Transport Procedure.
- On the Transport Procedure window, in the toolbar, right-click the transport procedure for which you want to define the transport procedure trajectory and then click Transport Procedure Trajectory.
- In the Transport Procedure Trajectory grid view toolbar, click . The Add Transport Procedure Trajectory dialog box appears.
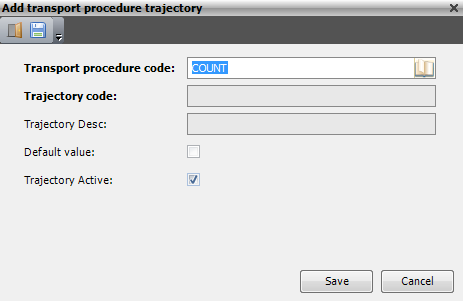
- Enter the following information.
Field Description Required Transport Procedure Code Unique system code that identifies the transport procedure. Yes Trajectory Code Unique system code for the trajectory within the transport procedure. Yes Default Value When selected, indicates that this trajectory is the default for the transport procedure. Yes Trajectory Active When selected, indicates that the trajectory is active. Yes - Click Save.
Transport procedure equipment
This process defines which equipment to use to perform tasks from one transport area to the same or another transport area. The equipment can be dependent on the transport procedure.
Add a transport procedure equipment
- On the menu, expand Basic Data > Equipments, and then double-click Transport Procedure.
- On the Transport Procedure window, in the toolbar, right-click the transport procedure for which you want to define the transport procedure equipment and then click Transport Procedure Equipment .
- In the Transport Procedure Equipment grid view toolbar, click . The Add Transport Procedure Equipment dialog box appears.

- Enter the following information.
Field Description Required Transport Procedure Code Unique system code that identifies the transport procedure. Yes Trajectory Code Unique system code for the trajectory within the transport procedure. Yes From Warehouse Code Unique system code for the warehouse of the transport area of origin. Must be a valid warehouse. Yes From Transport Area Code Unique system code for the transport area of origin. Must be a valid transport area. Yes To Warehouse Code Unique system code for the warehouse of the transport area of destination. Must be a valid warehouse. Yes To Transport Area Code Unique system code for the transport area of destination. Must be a valid transport area. The transport area of destination can be the same as the transport area of origin, or another one. Subtasks can only be performed if the combination of the transport area of origin and the one of destination exist in this table (even if origin and destination are in the same transport area). Yes Equipment Group Code Value that specifies the equipment group that must be used for the given transport procedure to perform task details that start on a location in the ‘from transport area’ and go to a location in the ‘to transport area’. For each possible transport step, an equipment group must be specified. Yes Task Scheduling When selected, indicates that subtasks generated by the given transport procedure and going from the transport area of origin to the destination transport area, can be taken into account for scheduling. Subtasks will be taken into account for scheduling if both this parameter and the similar one in the time default table have the value Y. Yes Allow Other Area When a task is confirmed, it is possible to deviate from the proposed location. When selected, indicates that the deviating location may be in another transport area. This is only interpreted for the last subtask of a task (for previous subtasks, no deviation to another transport area is allowed). Yes - Click Save.
Transport procedure routes
A transport procedure route is used to define the link to an extra (intermediate) transport area, which is used to perform tasks from one transport area to another transport area.
Add a transport procedure route
- On the menu, expand Basic Data > Equipments, and then double-click Transport Procedure.
- On the Transport Procedure window, in the toolbar, right-click the transport procedure for which you want to define the transport procedure route, and then click Transport Procedure Route.
- In the Transport Procedure Route grid view toolbar, click . The Add Transport Procedure Route dialog box appears.
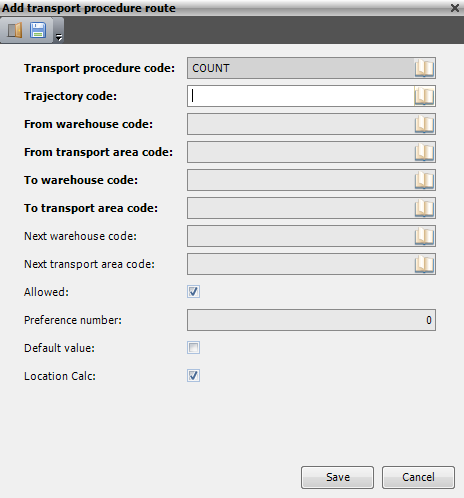
- Enter the following information.
Field Description Required Transport Procedure Code Unique system code that identifies the transport procedure. Yes Trajectory Code Unique system code for the trajectory within the transport procedure. Yes From Warehouse Code Unique system code for the warehouse of the transport area of origin. Must be a valid warehouse. Yes From Transport Area Code Unique system code for the transport area of origin. Must be a valid transport area. Yes To Warehouse Code Unique system code for the warehouse of the transport area of destination. Must be a valid warehouse. Yes To Transport Area Code Unique system code for the transport area of destination. Must be a valid transport area. The transport area of destination can be the same as the transport area of origin, or another one. Subtasks can only be performed if the combination of the transport area of origin and the one of destination exist in this table (even if origin and destination are in the same transport area). Yes Next Warehouse Code Value that defines the first warehouse that is passed for tasks that start on a location in the ‘from transport’ area and go to a location in the ‘to transport’ area. It must be a valid warehouse. Yes Next Transport Area Code Value that defines the first transport area that is passed for tasks that start on a location in the ‘from transport area’ and go to a location in the ‘to transport area’. If no intermediate steps are needed, no record must be entered; a record in the transport procedure equipment suffices. Yes Allowed When selected, indicates that this definition record is allowed for use. Yes Preference number Informational only. No Default Value When selected, indicates that this value is the default. For each transport procedure trajectory in combination with a ‘from’ and ‘to transport’ area, only one ‘next transport area’ can be indicated as the default. Yes Location Calculation When selected, indicates that a destination location must be calculated for the described transport step. Currently not in use. Yes - Click Save.
Time defaults
Time default is used to define the procedure to use to perform tasks in or between transport areas. These procedures can differ according to the warehouse, task type and time of day.
Add a time default
- On the menu, expand Basic Data > Equipments, and then double-click Time Default.
- On the Time Default window, in the toolbar, click . The Add Time Default dialog box appears.

- Enter the following information.
Field Description Required Warehouse Code Unique system code that identifies a warehouse. Yes Task Type Value that defines the task type for which the time default is valid. It is possible to define a time default with a blank task type. This default will be used for all tasks with a type for which there is no specific default. Yes Expiry Time Time of the day when the transport procedure must be used for a given warehouse and task type. No Transport Procedure Code Unique system code that identifies the transport procedure. In this setting, this indicates the transport procedure to be used for the warehouse, task type and period. Yes Task Scheduling When selected, indicates that the subtasks, generated as a consequence of the specified time default, can be taken into account for scheduling. This parameter goes together with a similar one in the transport procedure equipment table. No Time Type Value that indicates if the covered time-interval is considered as day (D) or night (N). Informational only. Yes Initial Priority Value that indicates the initial priority. It is copied into the tasks and subtasks that are generated based on the specified time default. No Priority Increment Value that indicates the priority increment. It is copied into the tasks and subtasks that are generated based on the specified time default. No Priority Change Delay Value that indicates the priority change delay. It is copied into the tasks and subtasks that are generated based on the specified time default. No - Click Save.
Equipment combinations
Equipment combination is used to indicate which equipment details may (or may not) be active concurrently in one equipment zone.
Add an equipment combination
- On the menu, expand Basic Data > Equipments, and then double-click Equipment Combination.
- On the Equipment Combination window, in the toolbar, click . The Add Equipment Combination dialog box appears.

- Enter the following information.
Field Description Required Warehouse Code Unique system code that identifies a warehouse. Yes Equipment Zone Code Unique system code that identifies an equipment zone. Yes First Equipment Code Unique system code that identifies a piece of equipment. In this setting, it defines the equipment that may or may not combined with the equipment defined in the Second Equipment Code. Yes Second Equipment Code Unique system code that identifies a piece of equipment. In this setting, it defines the equipment that may or may not combined with the equipment defined in the First Equipment Code. Yes Allowed When selected, indicates that the First Equipment Code may be combined with the Second Equipment Code. Yes - Click Save.
